Quick Start: Interior Rendering
Introduction
Choosing a Preset
Podium Material Properties
Choosing the light sources in each scene
References to other tutorials
Summary of tips from this tutorial
Introduction
This quick start tutorial is primarily for customers that are starting to use SU Podium and are looking for methods to develop good interior photo-realistic images. The tutorial will apply the use of presets, the different type of lighting and examine Podium material properties. However, in this tutorial, we will not actually apply materials as the model already has materials in it. This tutorial draws heavily from already existing tutorials so I have listed all relative tutorials in the below reference section.
If you want to go through a tutorial on how to apply materials, try the quick start materials tutorial before starting on this interior tutorial. Also, take a look at the materials video tutorial.
This tutorial uses the Interior-with-lights-sample-su17.skp SketchUp 2017 model. This model has seven scenes besides the LEM face scene. The LEM face scene is just for your reference when creating a LEM light and should not be rendered.
Below I have outlined three general steps in creating a good interior rendered image. One is choosing the best preset. Another is choosing light sources. A third is applying Podium material properties to materials. You do not have to do these processes in any particular sequence although in my experience the above sequence works the best. But for the final rendered image that you produce, you will need to do all three things - choose the best preset, choose the best light sources, apply the best materials and material properties.
Choosing a preset
Presets are very important in any rendering. Choosing the correct preset is not difficult. The presets are listed in the Options dialog box. There are many presets to choose from so this may seem confusing. But in reality there are only three categories of presets. One is the default.pps preset, which is the fastest preset but is not configured for exterior or interior scenes. Second type of preset is the Exterior, usually used for exterior or outside scenes. Third type of preset is the Interior, used for interior or inside scenes.
Reference: Please examine the preset comparison page here. This will give you a visual guide in the effect of each preset with various scenes. There is also a very good tutorial guide on choosing presets here. The Choosing Presets tutorial is long but by reading it carefully you will understand how SU Podium works. You will also obtain knowledge of what photon mapping is and the difference between biased and unbiased rendering. A quicker and simpler guide to Presets can be read here and a video tutorial on presets is also available.
I will do a quick review about choosing presets and what presets I used for the rendered images here.
Interior vs Exterior preset:
Among other things interior presets have more light bounces therefore are much brighter than the exterior presets. The interior presets render slower because of the higher number of light bounce calculation. Interior presets should only be used in an interior scenes. If they are used in an exterior scene, the rendered image will often be too bright.
Exterior presets have fewer light bounces and are ideal for exterior scenes with sun or HDRI/ IBL light. However, using exterior presets in an interior scene is often very effective. In this model, I used an Exterior_high and exterior_default presets with the scenes that had recessed lights.
There is also a "neutral" preset called default.pps. This preset is not tweaked for exterior or interior scenes. So you can use it for both exterior and interior scenes. For exterior scenes, it is an excellent alternative to the exterior_default_2.0 preset.
The particular recessed lights that I choose in this model are Fagerhult_Rondo. These use spot lights. Spot lights are much brighter than point lights so the rendered image was too bright for my liking when I used an interior preset. You can change the light level of the rendered image easily now with Podium Image Editor but it is more effective to make a dark image brighter with the light levels than to make an over exposed image, darker. So that is why I used exterior presets for the scenes with the recessed lights. I tweaked the images in Podium Image Editor to brighten them.
Types of Presets:
I used both Exterior and Interior presets in this model. Let me review the types of presets that are available in the Interior and Exterior categories.
_preview preset has no anti-aliasing. This is the fastest Interior or Exterior preset. But it applies no edge smoothing. Therefore only use this preset to examine or preview your rendering. Do not use Preview preset for your final rendered image.
_default.pps are the standard interior and exterior presets to use. They are fast. In most cases interior and exterior default presets will have good quality. However, in interior scenes with light material colors, blemishes or artifacts can appear.
_fine presets are the same as _default presets except for one thing. The anti-aliasing is set very high so the edge smoothing is very good. But besides anti-aliasing the quality is the same as _default presets.
_high presets. These presets have the highest light bounces and usually the most effective way to remove blemishes. They will produce very high quality images. However, the render time for _high presets is two to three times longer than _default. So do not use this type of preset for a quick preview.
_QMC. QMC do not use irradiance caching. QMC presets is an unbiased raytracing method. The render time will be very long but QMC produces arguably the highest quality images. If you have problems with blemishes and _high preset does not completely remove them, use _QMC. However, because Podium puts a time limit on the QMC rendering, the final image can appear grainy. The recommended procedure is to use a pixel resolution size that is two or three times larger than you want. Then in Photoshop reduce the final image size. This will remove the graininess.
There is also the "neutral" default.pps preset. I often use this preset for exterior scenes as it is fast and produces less artificats than exterior_default_2.0.pps.
Choosing materials and properties
Let me examine the model and the materials used.
The floor is wood acajou. It came from Podium Browser.
Tip: If you use the default SketchUp materials that come installed with SketchUp, turn on Automatic Materials located in the Options dialog box. Automatic Materials will automatically apply reflections/ bumps and other properties that the Cadalog team has pre-assigned to the default SketchUp materials.
My recommendation is not to use the default SketchUp materials but to import higher resolution images for your materials. Podium Browser has hundreds of high quality and render ready materials so is a good source. But there are many sources for high resolution images.
The floor wood acajou Podium properties can be examined by selecting the material and opening the Podium Materials dialog. Note that I am not using Blurred reflections. I turned this off. However, if you download wood acajou from Podium Browser, by default it has blurred reflections on.
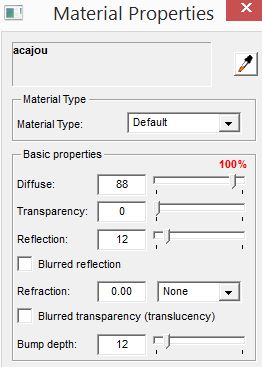
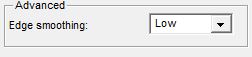
Tip: You can speed up the rendering by setting the Advanced Edge Smoothing for a specific material to low or none. On a large area material such as this wood floor, setting the Advance Edge Smoothing to low does not necessarily result in lower quality rendered image.
For the walls I choose a wall paper material. Note that the wall paper materials from Podium Browser have no Podium materials properties.
The ceiling is using PDM_canvas_01 also from Podium Browser. This material also has a Podium bump percent of 8%. This material found in the Materials/ Fabric category.
Please examine the doors and exterior using EditInPlace. The doors have glass material that has Podium reflections. The door handles have highly reflective chrome material.
Tip: You can achieve a good chrome effect simply by using a gray color and making the reflection of the color 75 percent or higher.
Choosing the light sources (for each scene)
In this model I create seven scenes that use different light sources or a combination or light sources.
Reference: Please read this tutorial for a good reference on choosing light sources for interior scenes. Another tutorial is a chapter in the "Introduction to Photorealistic Rendering in SketchUp" series. This chapter focuses on lighting but it does not discuss HDRI/ IBL lighting.
The highest quality and fastest light source is the day time sun. I usually use a Physical Sky with the sun. Physical Sky simulates sky atmosphere and turbidity so is more realistic than SketchUp backgrounds. But for many interior renderings, physical sky is not important as it is for outdoor or exterior scenes.
Tip: SketchUp shadows must be on for the sun light and physical sky to render in Podium.
Day time with sun scene:
In the first scene, the primary light source is the sun. (Sky is also a light source but not a strong influence.) The time of day is 6:50 AM on June 21.
Tip: used the Set North tool from SketchUp to make sure that the sun light was coming directly into the interior. If you don't have Set North tool, download it from Extension Warehouse
Podium's Global Illumination (indirect lighting) is very good and often just with sun light and an interior preset, the entire interior scene can be illuminated realistically.
Compare the two images below. The left one uses interior_default preset. The right one use interior_high preset. As you can see in this case, there's not much difference in quality. The interior_default preset renders much faster though.
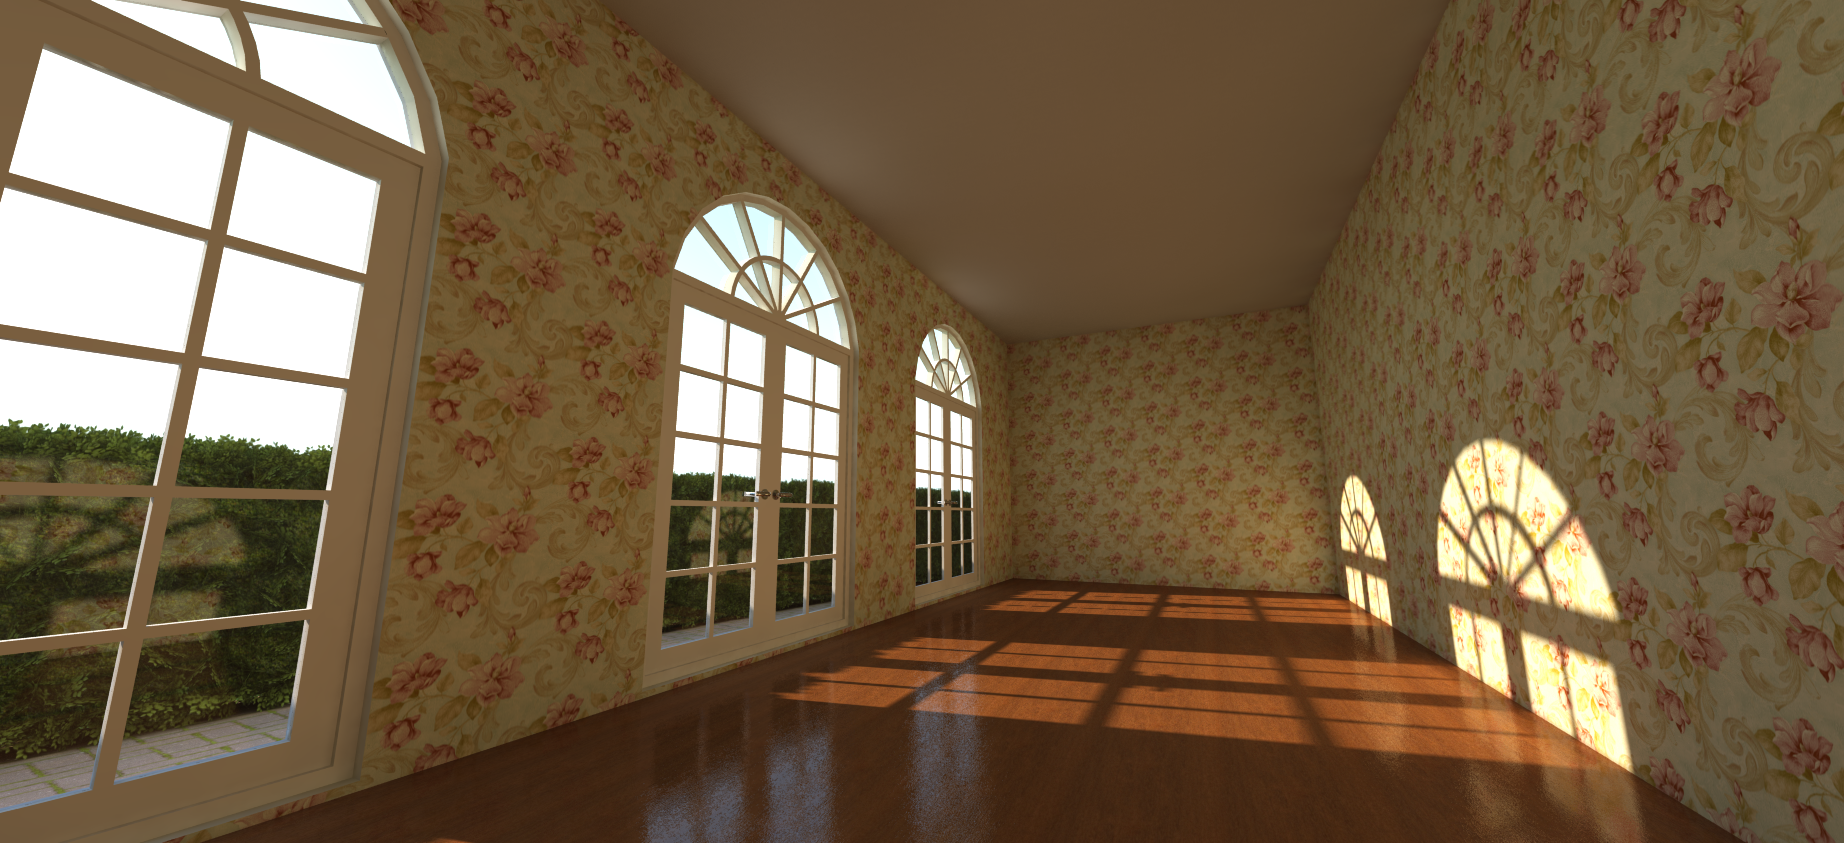
Interior default preset
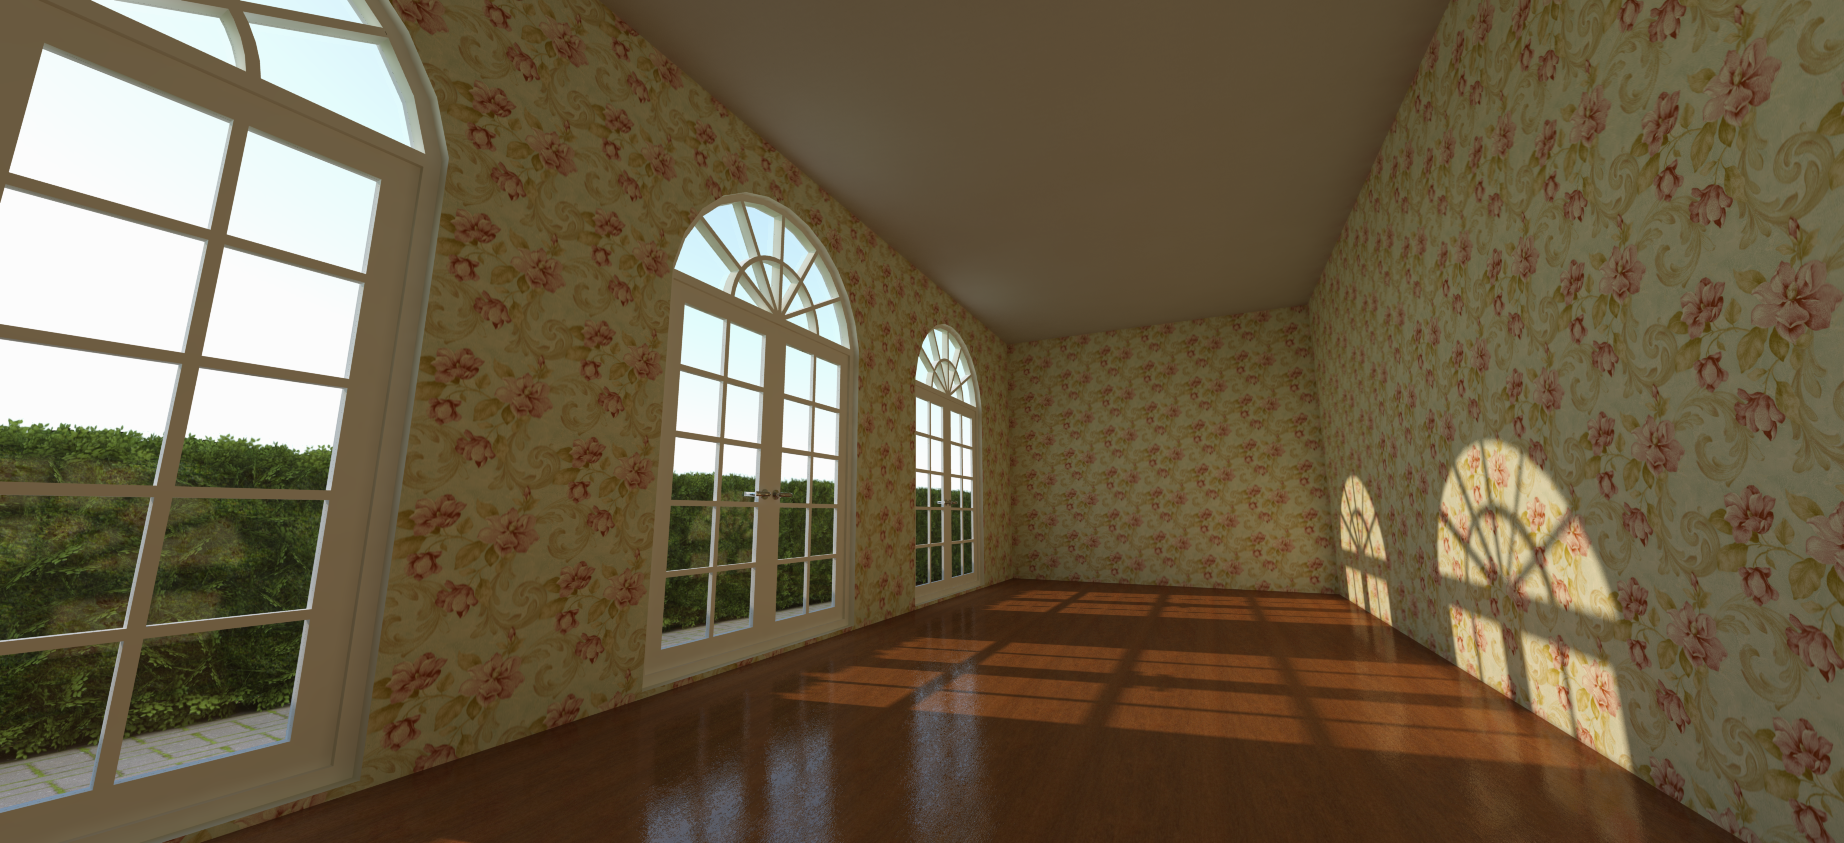
Interior high preset
Click on the images to view full resolution
Daytime with sun and lights:
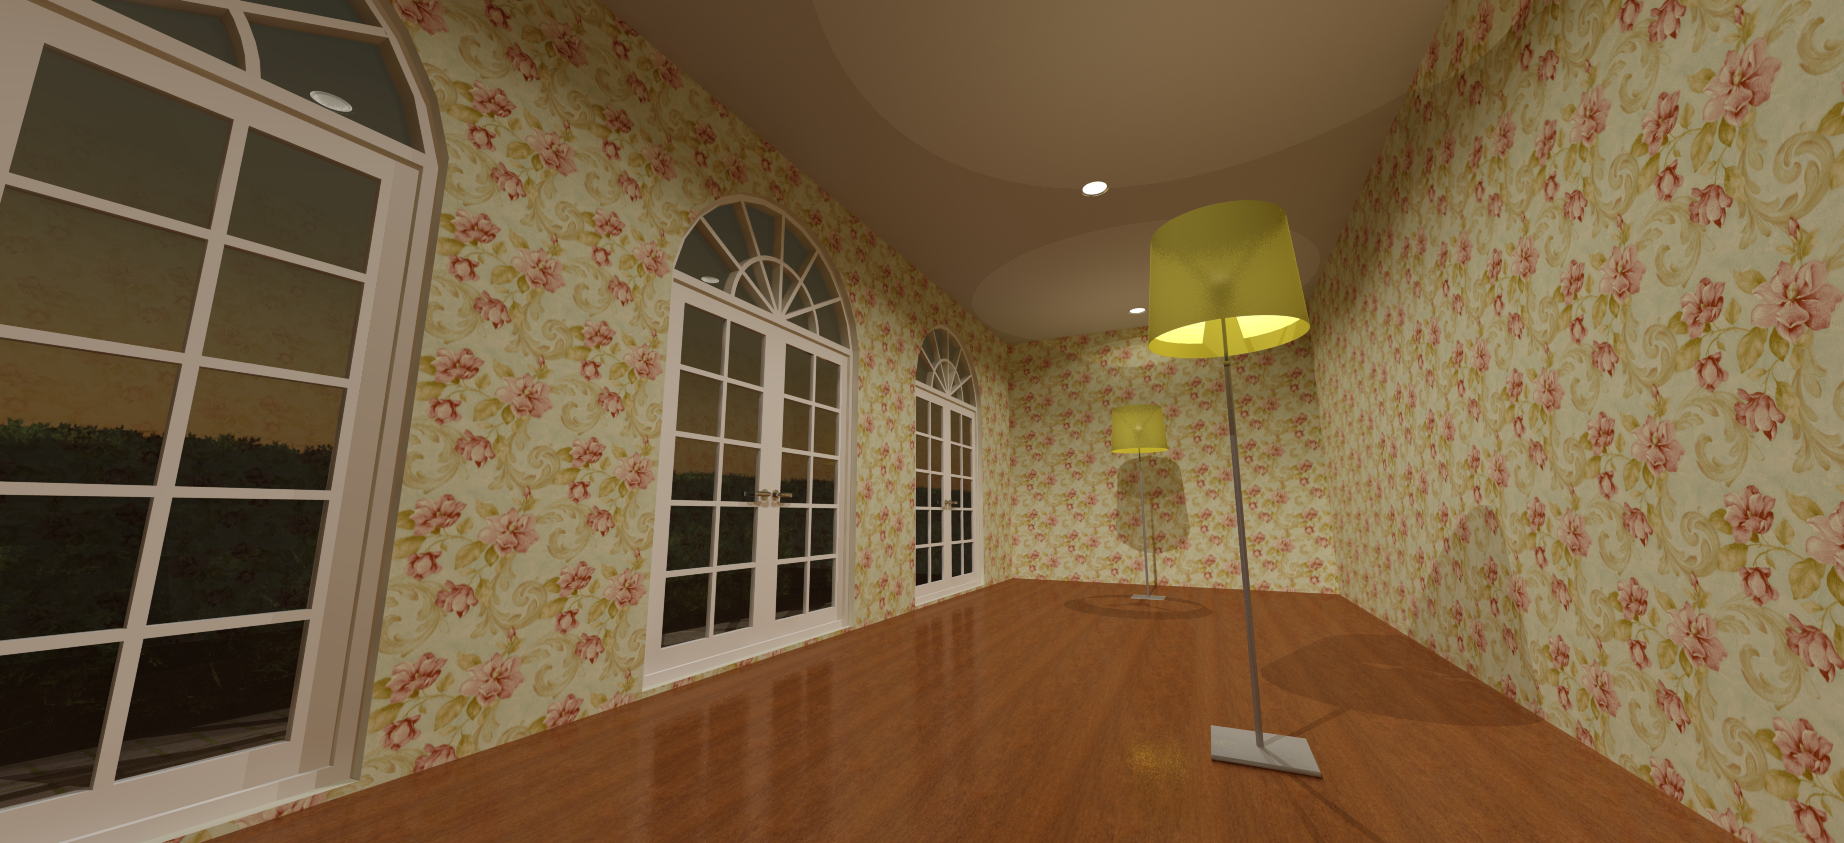
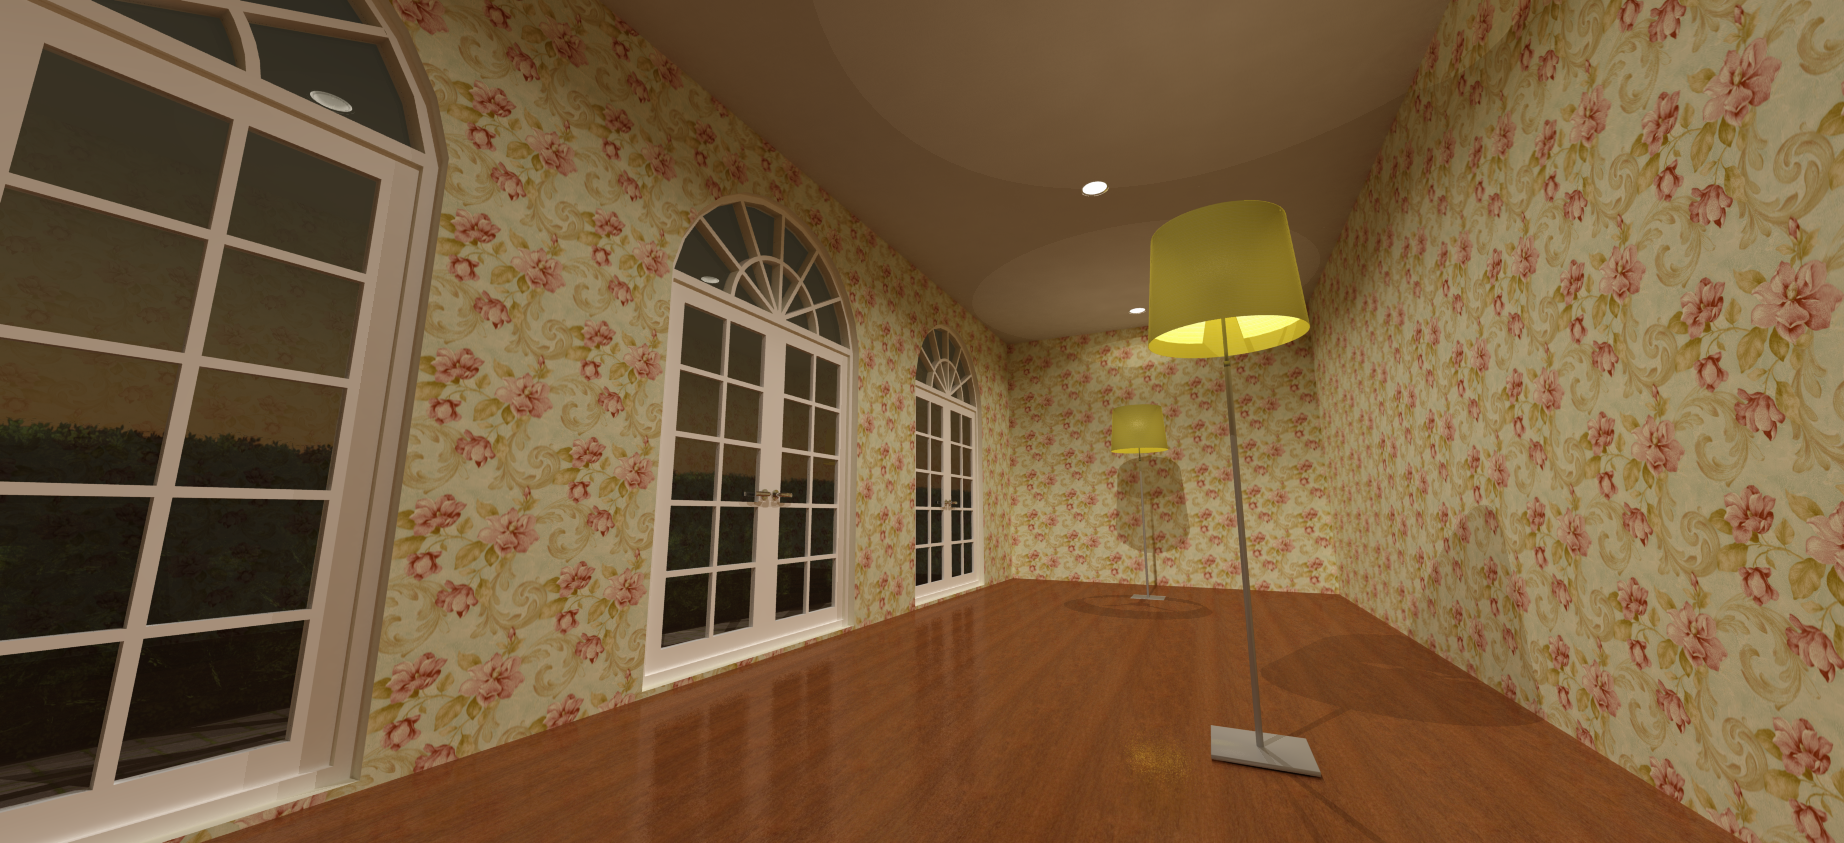
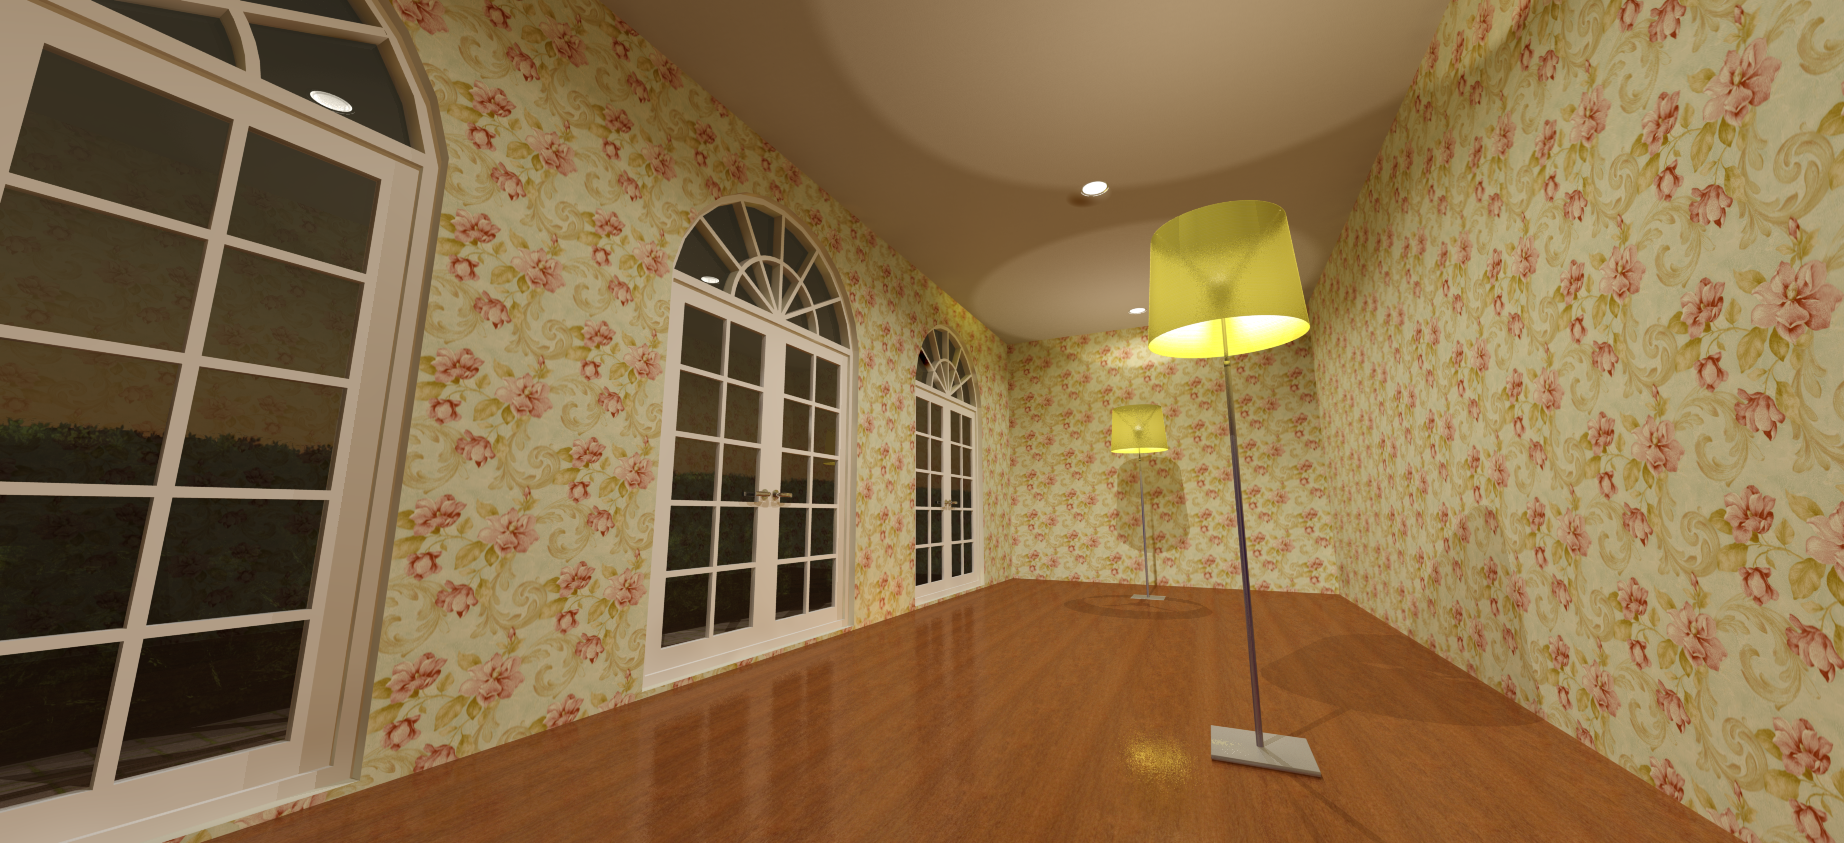
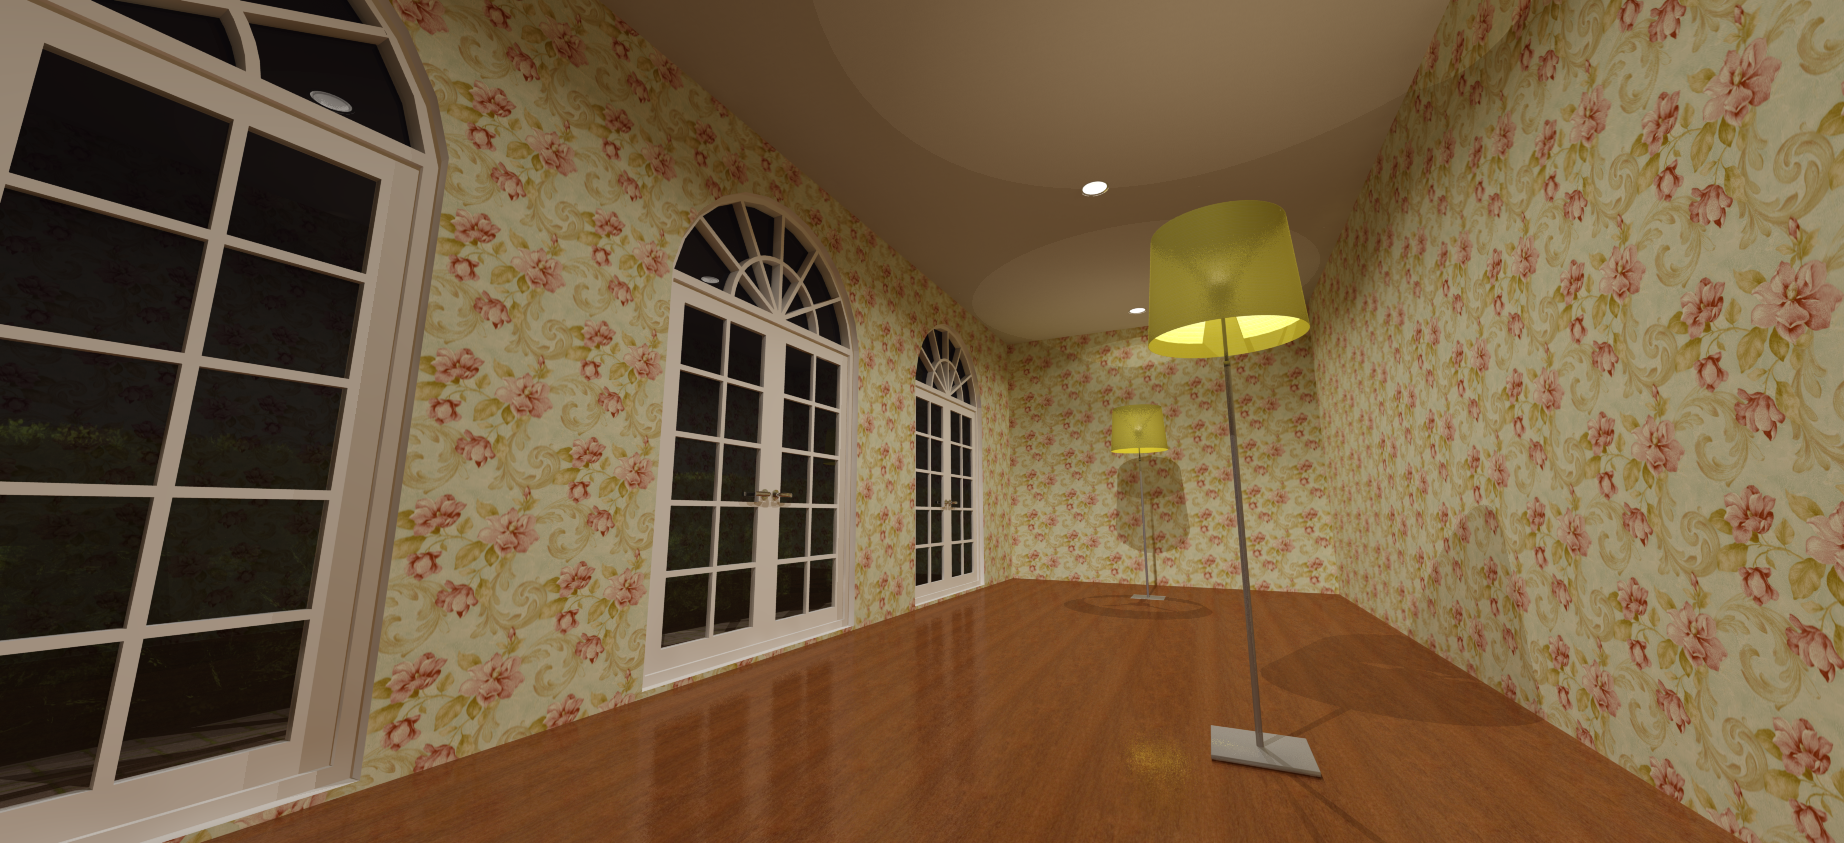
In this scene I placed two forscarini floor light fixtures in the room. These light fixtures use point lights. But the time of day is the same as the previous scene.
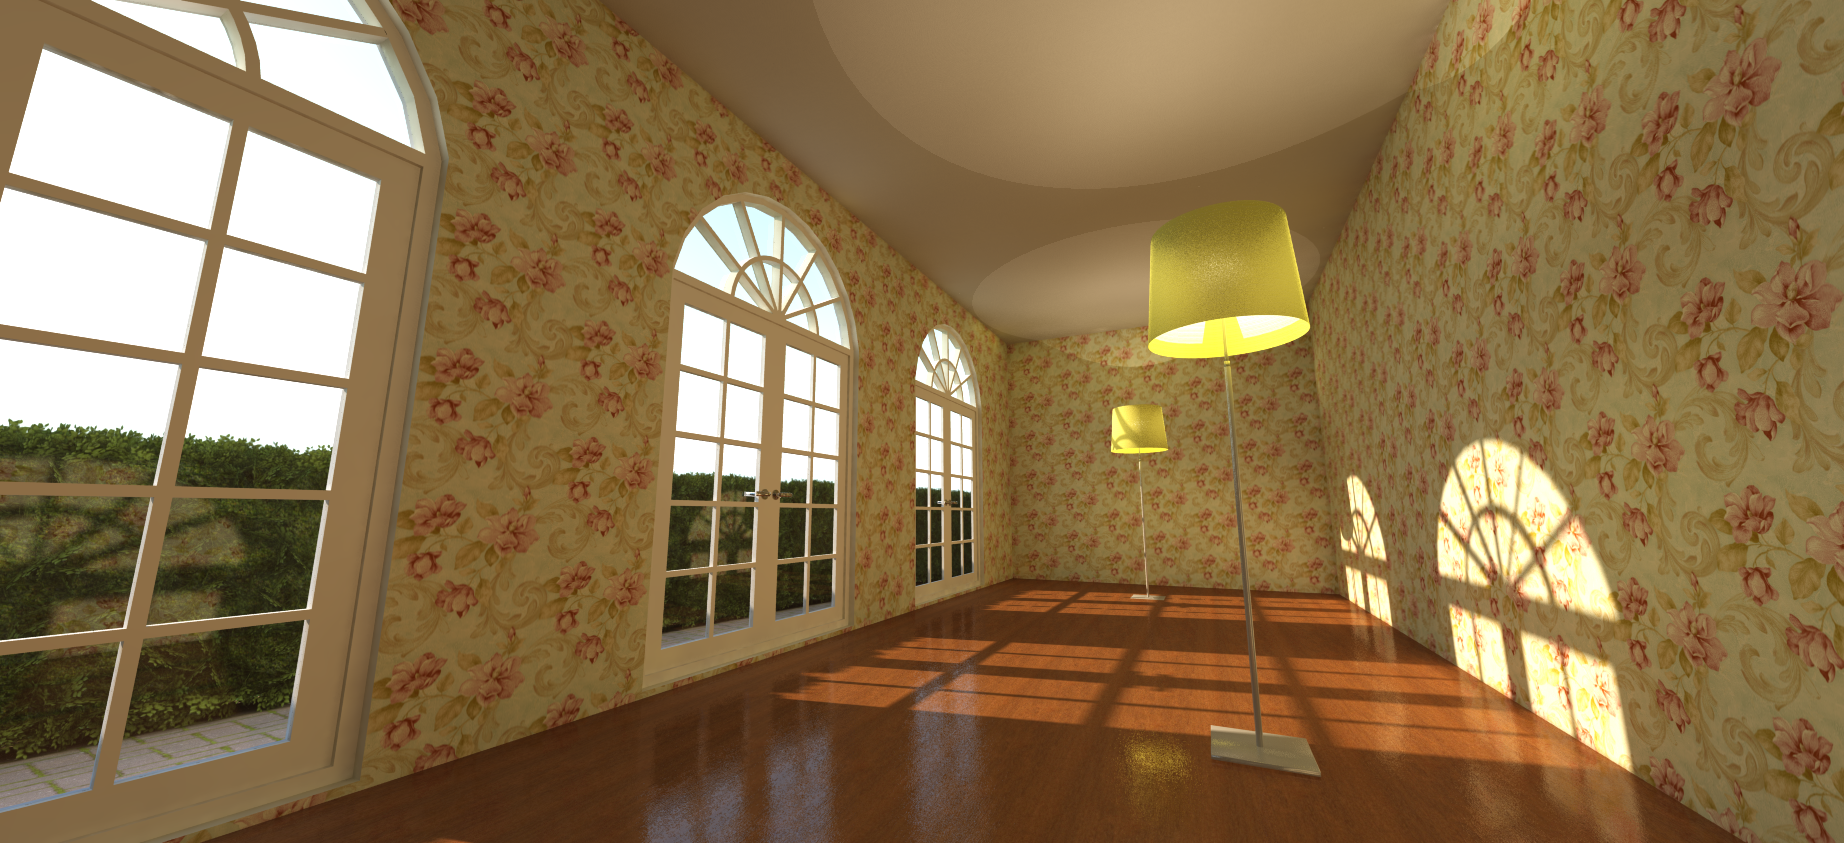
Interior default preset
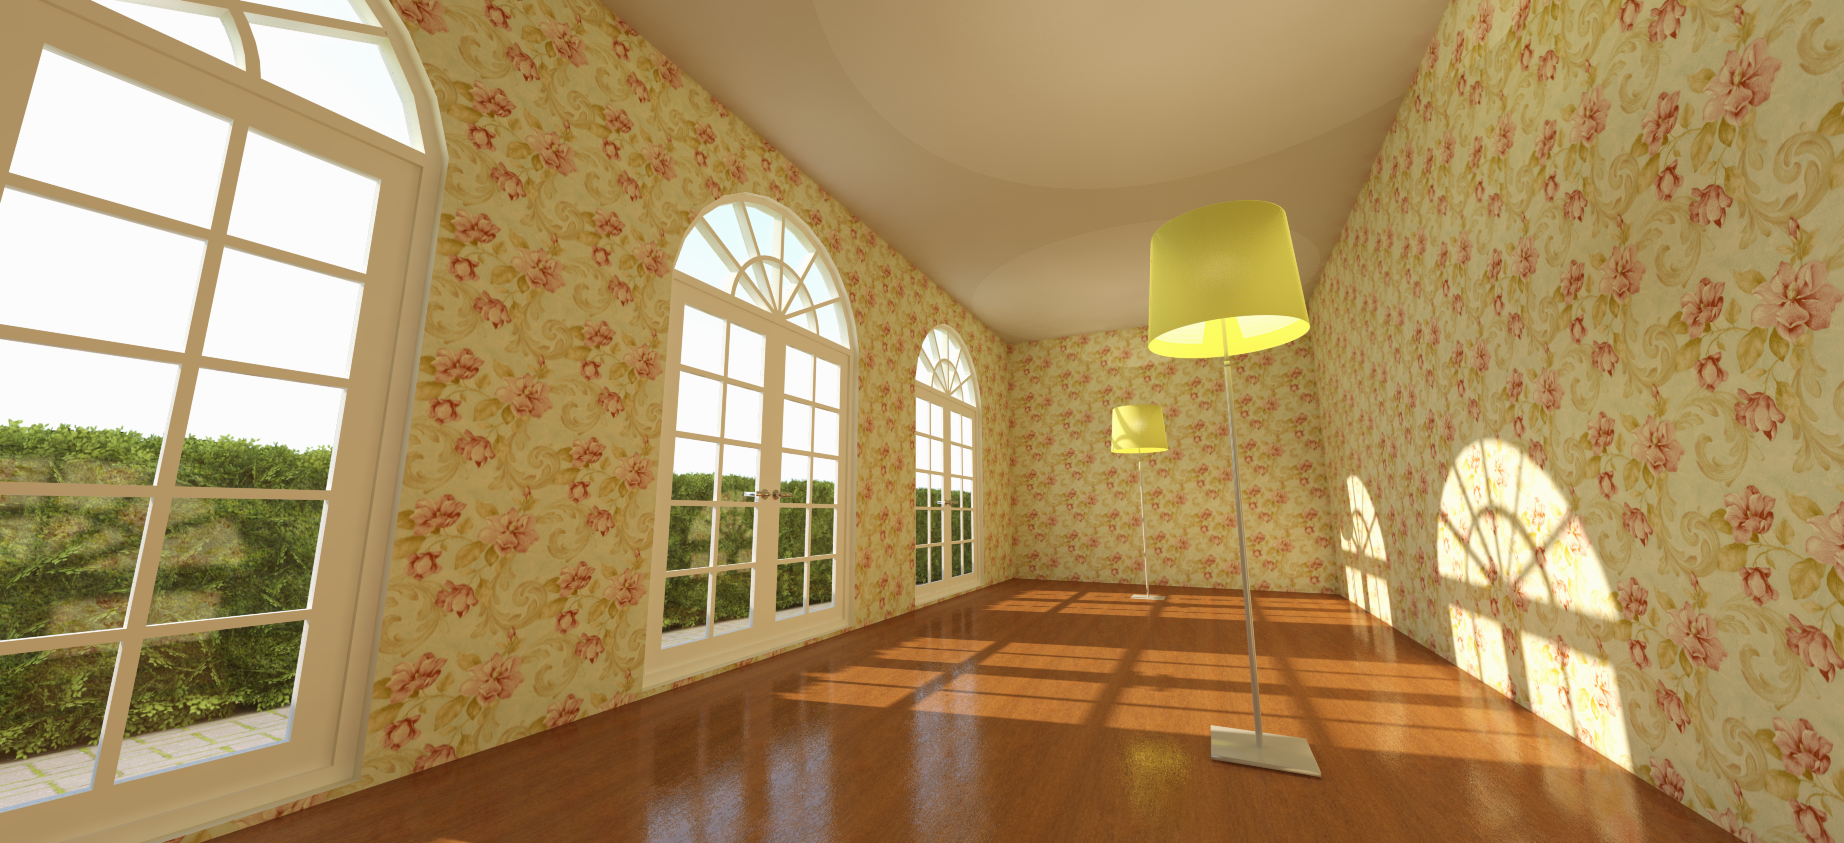
Interior high preset
Click on the images to view full resolution
Clearly the image using interior_high preset is brighter than the image using interior_default.
Night scene with lights and Physical Sky 2:
This scene's time of day is set to 2:50 AM, and is using three Fagerhult recessed lights from Podium Browser. Physical sky 2 is better for rendering night scenes than Physical Sky 1.
Tip - All the recessed lights from Podium Browser use SketchUp's auto-cut feature. Therefore when you place the recessed lights on a ceiling or a wall, the lights will appear to cut the SketchUp face. In reality, the ceiling cut is an illusion and the face is not being intersected and trimmed. When you remove the light, there is no hole in the face. But the auto-cut feature makes recessed lights very realistic.
The Fagerhult recessed lights use spot lights with a light power of 5. There are three recessed lights in the model. In general spot lights are brighter than point lights. These spot lights have a light power of 5 making them very bright for this interior space. Therefore when using interior preset, the rendered image was too bright for my personal liking. See below.
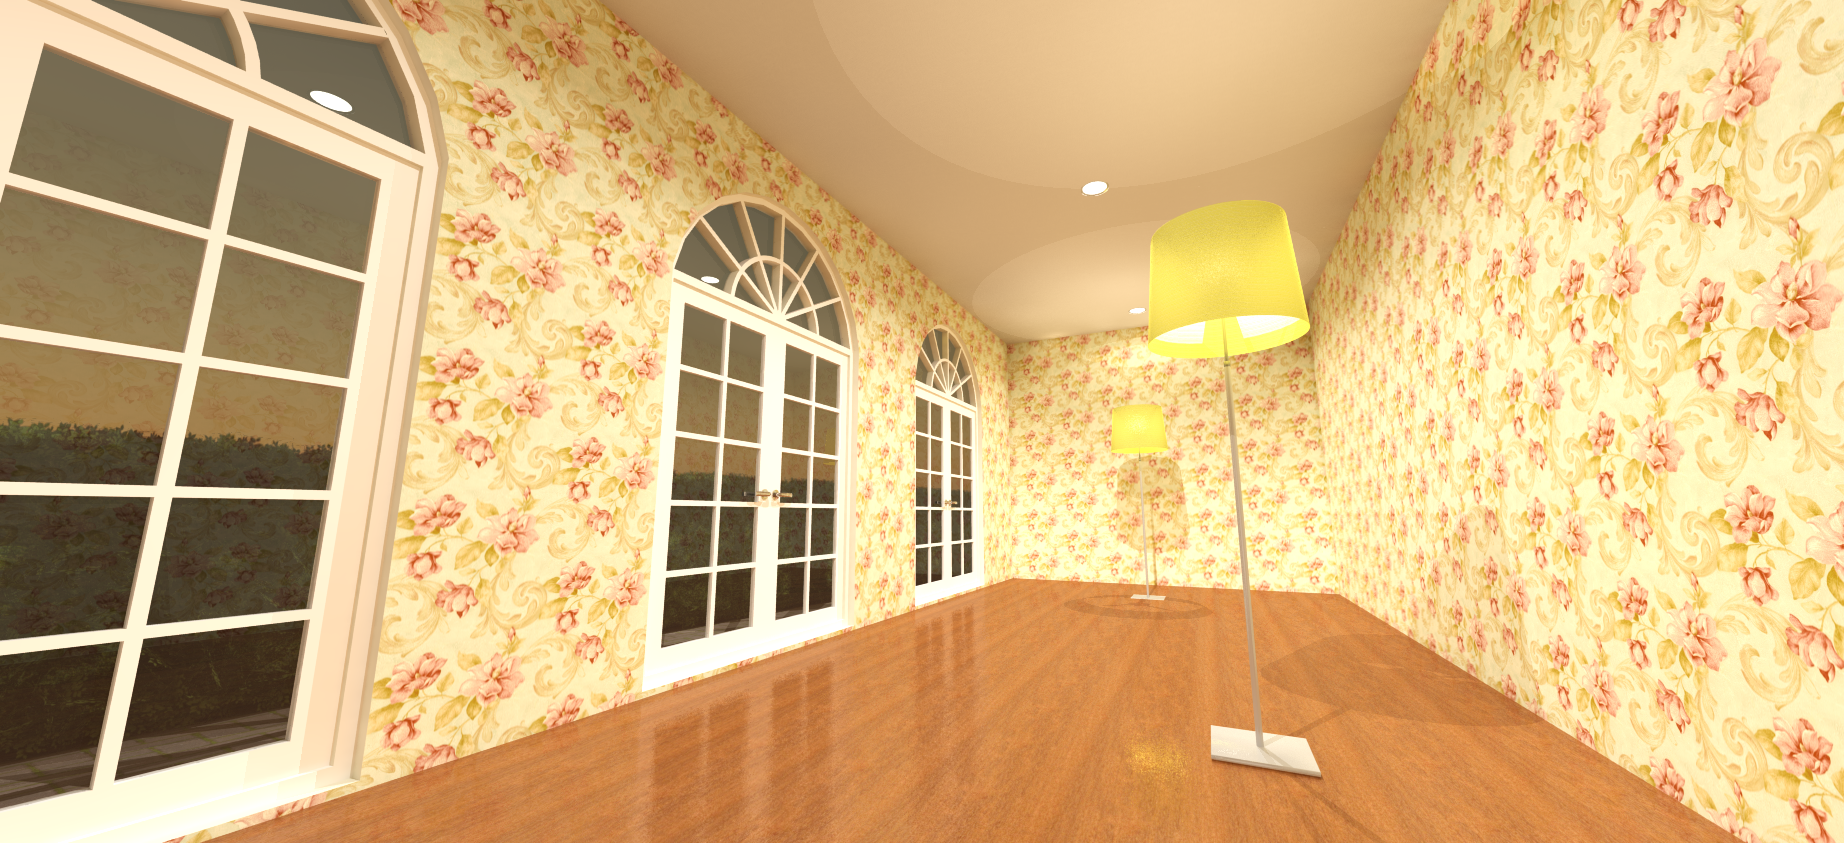
Interior default preset - Click on the image for the full resolution
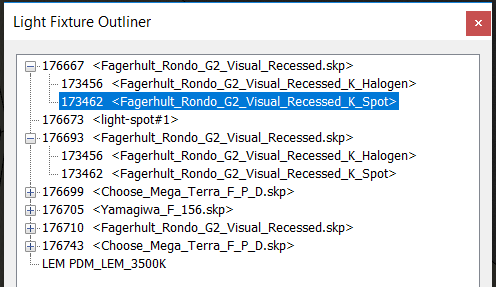
You can manage this over exposed lighting several ways.
One way would be to use Light Fixture Outliner,which is a plug-in available in the SU Podium Tools menu. Select the Fagerhult recessed light components. Then select the spot light group. Then while the spot lights are highlighted, open the Podium Light System and lower the light value. See below the image of light Fixture Outliner. See this video tutorial about changing the light power of Podium Browser fixtures using SketchUp's Outliner.
The way I managed the brightness however was to use an exterior preset as you can see in the two images below.
Exterior default preset
Exterior high preset
Click on the images to view full resolution
Tip: Use Podium Image Editor's Light level to brighten the rendered image. It's much more effective to illuminate a slightly dark image in post processing than it is to reduce the light level of an over exposed image.
You can see below, I have increased the light level using PIE.
Click on the image to view full resolution
In another example below, I used soft omni lights from the Options dialog box to produce a softer light edge on the ceiling of the floor lamp's lighting.
Click on the image to view full resolution
Style - Dark Night
The next scene is "night style". It is the same geometry as the previous scene but it uses Podium Styles, Night_1. For this I had to turn off SketchUp shadows so that Physical Sky would automatically be turned off. See the two exterior preset images below. Read about Podium styles here. Podium Styles are automatically installed into the SketchUp styles folder.
Exterior default preset

Exterior high preset
Click on the images to view full resolution
Night: Spotlight only
The next scene is "just spot". In this scene I turned off the light fixture layer and places two spot lights in the room. The Night_1 style is being used. Interior preset is being used.
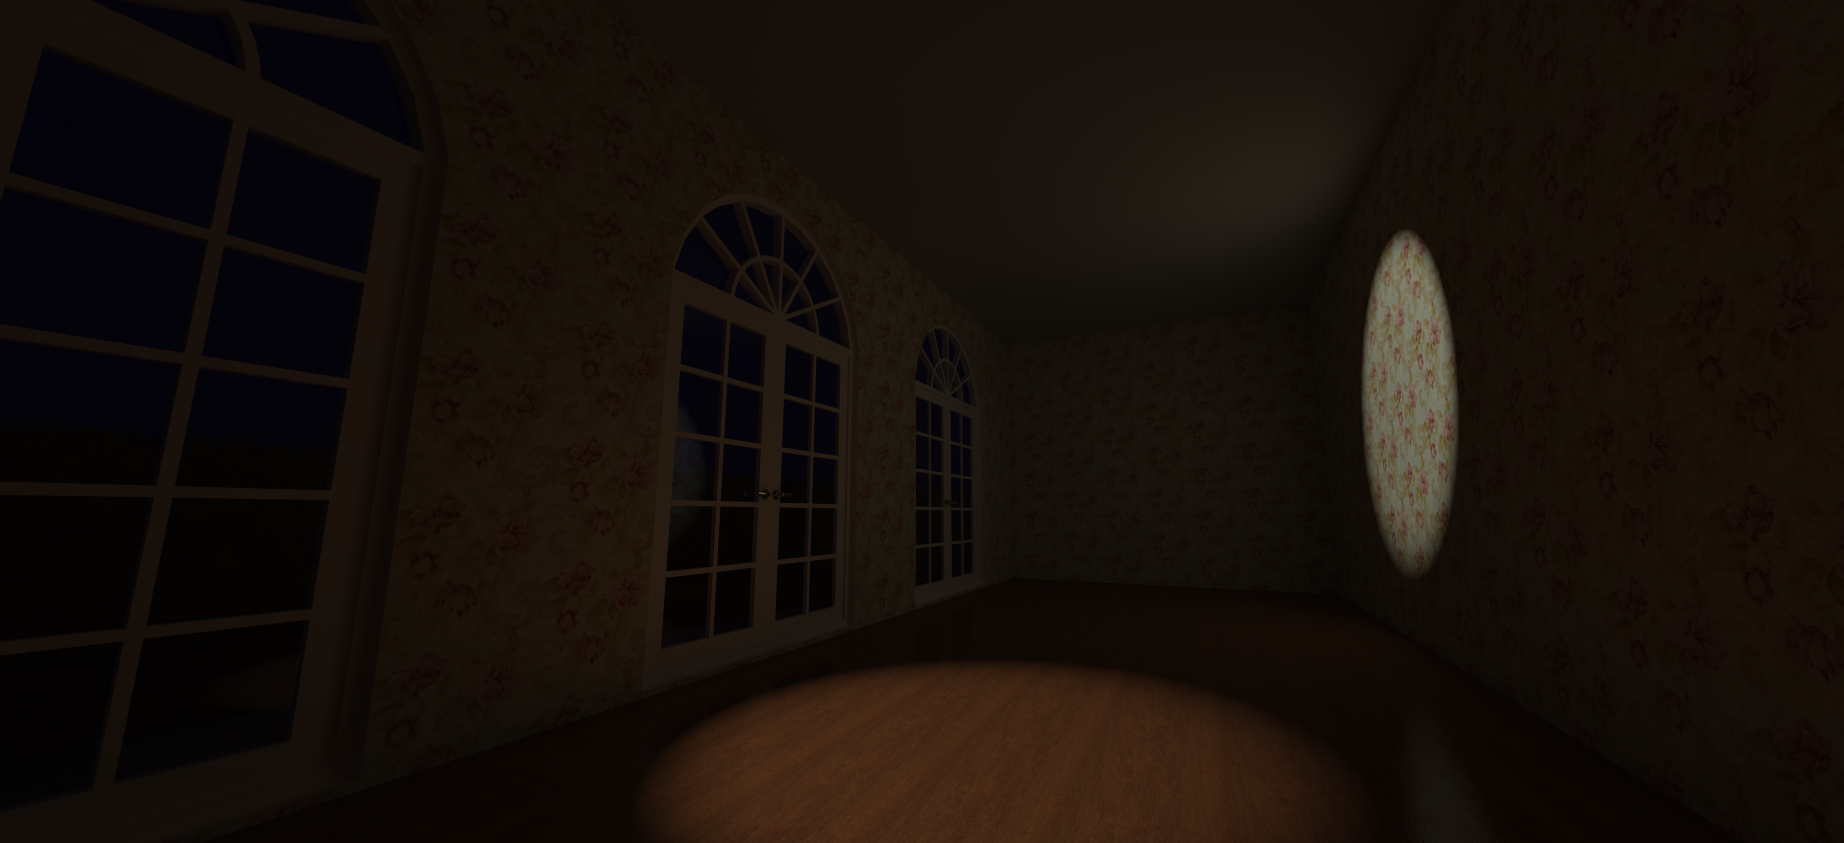
Interior high - Click on the image to view full resolution
Read about placing spotlights here.
LEM scene
The final scene is "LEM". This scene also uses Night_1 style. All the light fixtures and spot lights are hidden by turning off those layers. I placed a large LEM face behind the camera. You can examine this LEM face by using the LEM face scene. The LEM face and material is inside a group. Select the LEM face by highlighting it and open the Podium Materials dialog box. Light power is set to 20. High Intensity is not on. Hidden is not on because the LEM is behind the camera.
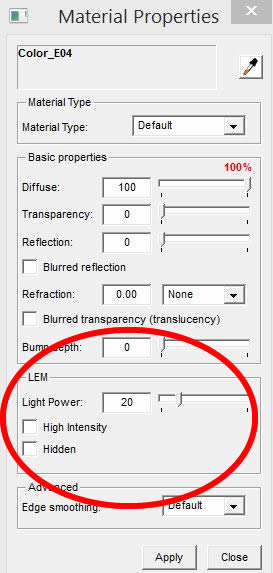
Tip: LEM High Intensity power value of 1 is equal to regular LEM power value of 10. LEM High intensity is not good to use in an interior scene. Because of other faces are near the LEM High Intensity light, a grainy, speckling rendering will be produced.
You can see that LEM is a very effective way to illuminate an interior space without using the sun. In this scene I used interior presets. Note how much better the quality of the image is using interior_high is compared to interior_default.

Interior default preset
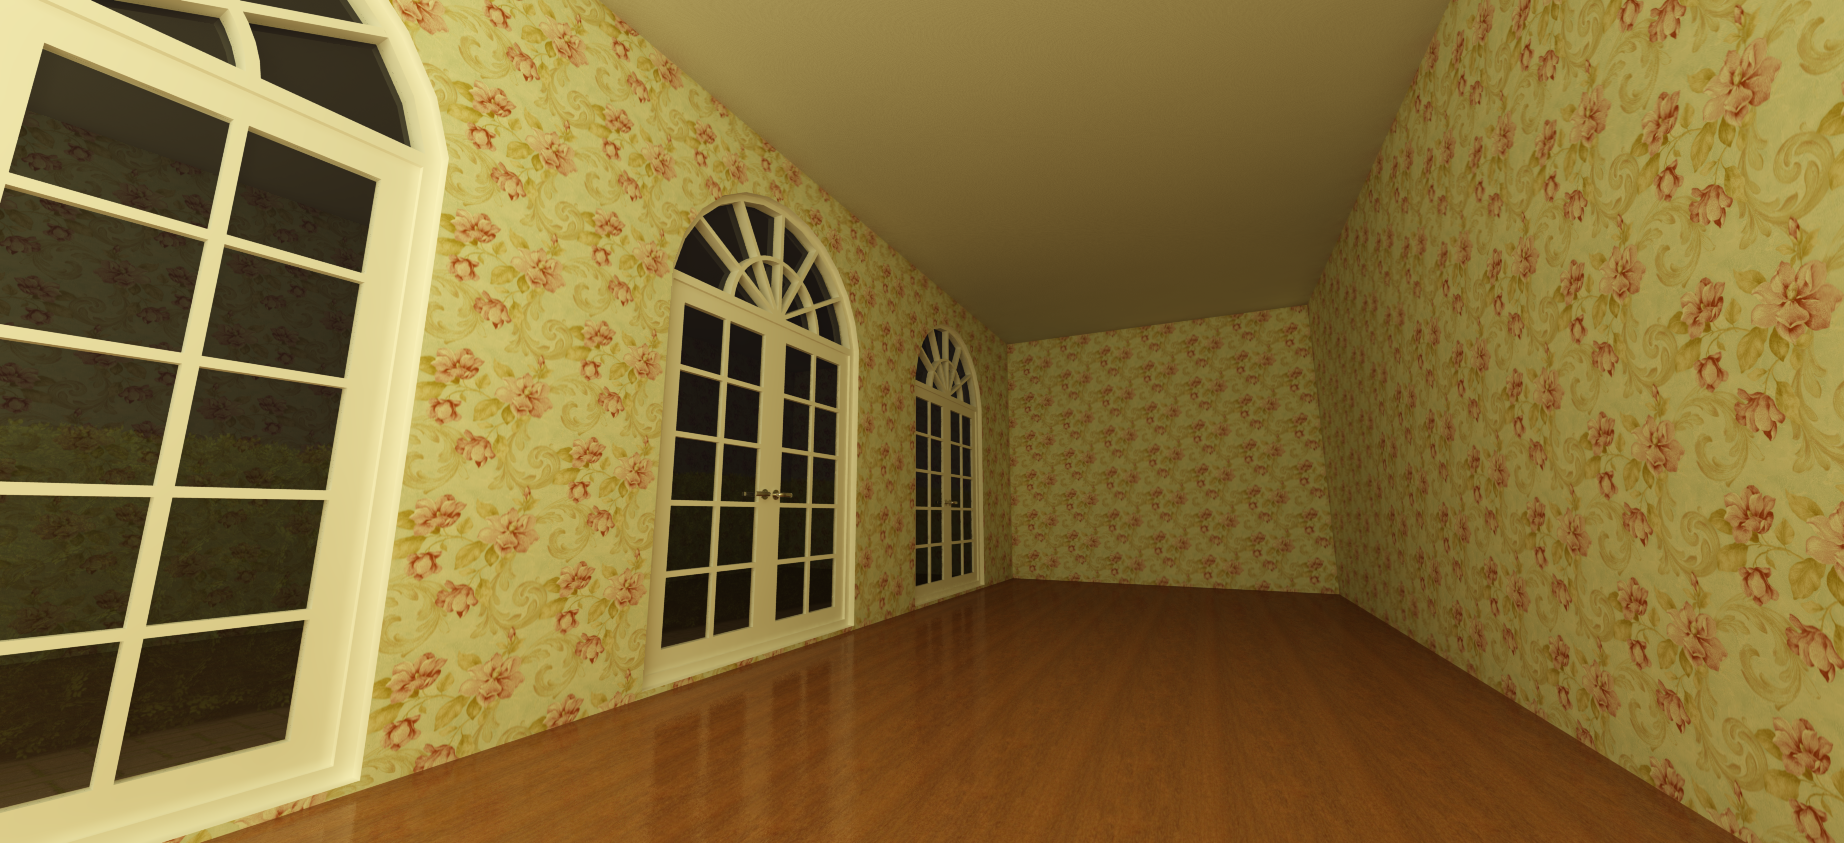
Interior high preset
Click on the images to view full resolution
Tip: LEM materials should never have any other Podium Material property applied to them. For example, do not have reflections or bump properties on an LEM material. This can cause the rendering to crash or turn the LEM material into a black face. In fact, it's best to use plain colors like yellow, white for LEM materials.
All Lights On scene
Here I turned on all layers, turned on shadows and PS2 and used Exterior_high with soft omni lights on. The LEM light is also on.
Exterior high preset with soft omni lights Click on the image to view full resolution.
HDRI/IBL lighting
With the SU Podium V2.6, a new type of natural lighting was introduced. This is HDRI/ IBL lighting which is an image based lighting source. The images are created from high resolution photographs and placed in the Podium rendered scene as backgrounds.
Read about HDRI/ IBL lighting in SU Podium V2.6 here. There is also a video tutorial that you can examine.
Typically HDRI/ IBL lighting is used primarily for exterior scenes because when using this light source in an interior scene, it can produce noise. To deal with the noise, I will use the interior_fine_AA preset.
You can also manage HDRI/IBL noise by rendering at a much higher resolution than needed and then scaling the image down. Another way to manager noise is to use a denoiser. A popular denoiser that I use is Topaz AI Denoiser
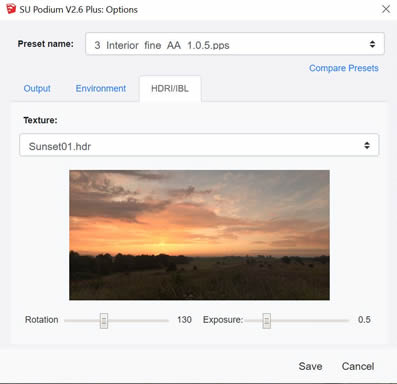
To access HDRI/ IBL lighting, you need to first choose the HDRI/ IBL background from the Options dialog box. Then select the HDRI/ IBL tab. Next, select an HDRI/ IBL image from the list of six images. There are 26 additional HDRI images you can download from Podium Browser. When you download these HDRI images from Podium Browser they will download to the HDRI folder automatically and will be readily available.
The above image of the HDRI/ IBL user interface, shows you the HDRI/ IBL background image I chose as well as the rotation and intensity.
Pick the Hdri scene from this model. This scene has the LEM and spot lights hidden. Note, the preset should be interior_fine_AA_105. Open the Podium Options dialog box and pick HDRI/ IBL backgrounds from the Environment tab. Then pick Sunset01 from the HDRI/ IBL tab and rotate the background so it looks like the UI image above.
Tip: HDRI/ IBL backgrounds are not controlled by the SketchUp sun position. The position of the sun in the HDRI/IBL background is close to the horizon. To control the sun's position use the rotation sliders. To control the intensity of the light, use the Intensity slider. HDRI/IBL background images will produce shadows but they will be softer than physical sun shadows.
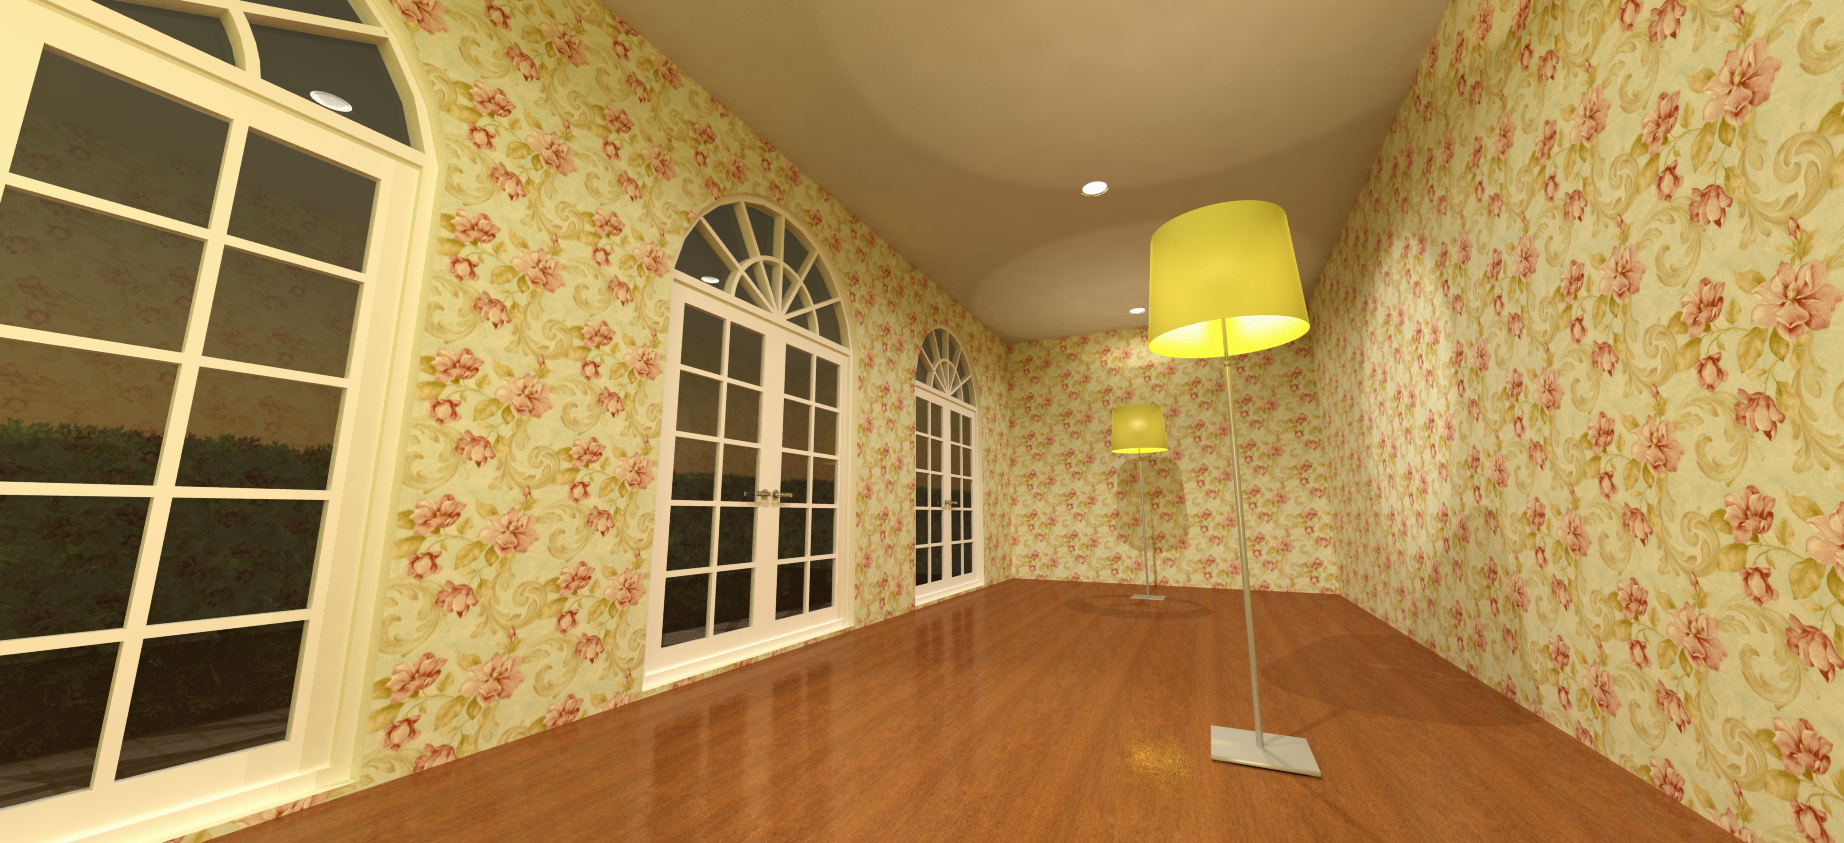
Below is the type of image you can expect. In this case, I rendered this at 3840 X 2160 and then scaled the image down in post processing to 1920 X 1080.
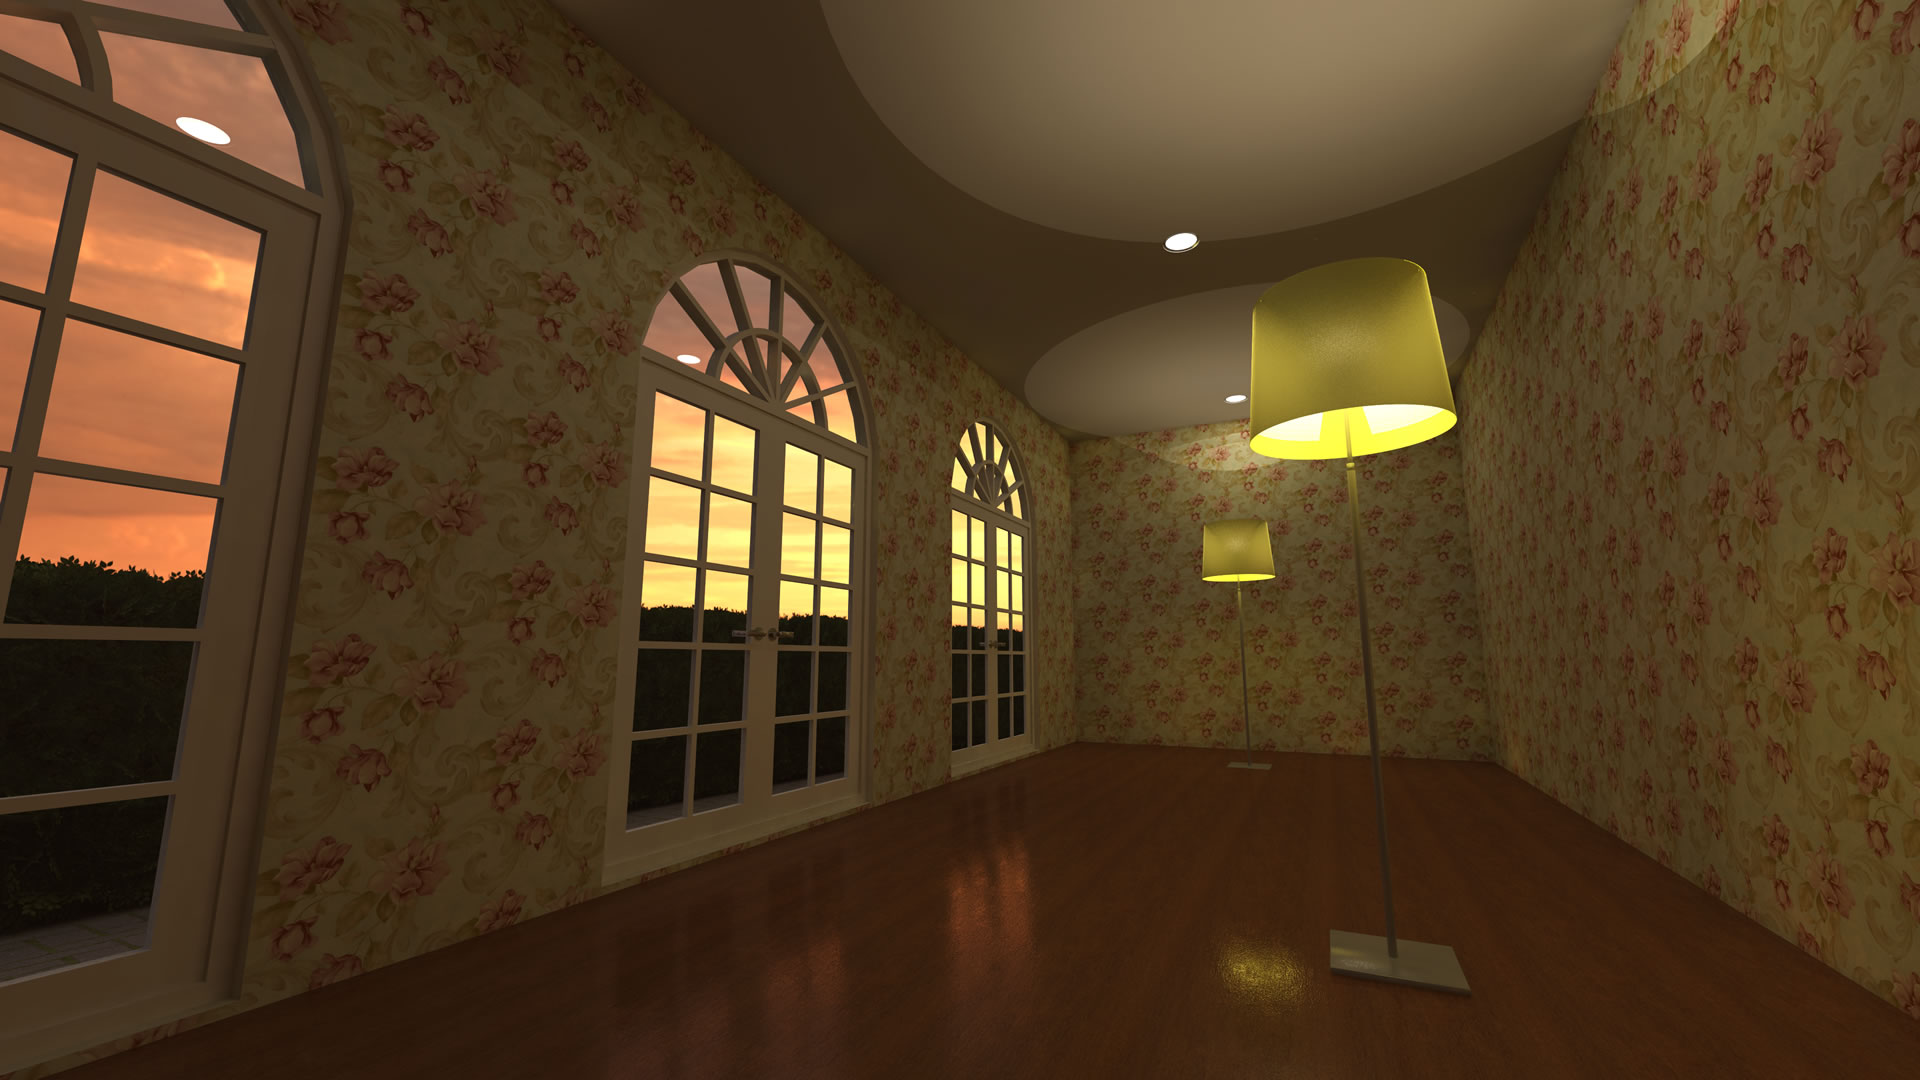
Click on the image to view full resolution.
References to other tutorials
- The SU Podium Preset Help page
- Preset Compare page fast way to compare preset results.
- A comprehensive guide of how to choose the best preset
- Features in Podium Image Editor such as light Levels
- How to use EditInPlace
- Interior Light tip tutorial compliments this tutorial
- Part 3 of Photorealistic Rendering in SketchUp is about Lighting
- Adjusting Light Power video tutorial
- Read about Light Fixture Outliner.
- Read about using Podium Styles as an alternative to Physical Sky.
- Read about placing spot lights here
- Learn about HDRI/ IBL lighting from this video tutorial.
Summary of tips from this tutorial:
- Automatic Materials: If you use the default SketchUp materials that come installed with SketchUp, turn on Automatic Materials located in the Options dialog box. Automatic Materials will automatically apply reflections/ bumps and other properties that the Cadalog team has pre-assigned to the default SketchUp materials.
- Advanced Edge Smoothing: Low You can speed up the rendering by setting the Advanced Edge Smoothing for a specific material to low or none. On a large area material such as the wood floor in this tutorial, setting the Advance Edge Smoothing to low does not necessarily result in lower quality rendered image.
- Chrome effect: You can achieve good chrome effect simply by using a gray color and making the reflection of the color 75 percent or higher.
- Shadows must be on: SketchUp shadows must be on for the sun light and the Physical Sky render in Podium
- Set North Tool: Use Set North tool from SketchUp to make sure that the position the sun light in the east. If you don't have Set North tool, download it from Extension Warehouse.
- Night scenes and PS2: For night scenes with Physical Sky, Physical Sky 2 is much more realistic than Physical Sky 1.
- Recessed lights and auto-cut: All the recessed lights from Podium Browser use SketchUp's auto-cut feature. Therefore when you place the recessed lights on a ceiling or a wall, the lights will appear to cut the SketchUp face. In reality, the ceiling cut is an illusion and the face is not being intersected and trimmed. When you remove the light, there is no hole in the face. But the auto-cut feature makes recessed lights very realistic.
- Light Levels and PIE: Use Podium Image Editor's Light level to brighten the rendered image. It's much more effective to illuminate a slightly dark image in post processing than it is to reduce the light level of an over exposed image.
- Soft Omni lights: Soft omni lights take longer to render and will make the point lights brighter but look very natural.
- LEM High Intensity: LEM High Intensity power value of 1 is equal to regular LEM power value of 10. LEM High intensity is not good to use in an interior scene because of close proximity to other faces. High Intensity in an interior can produce grainy, speckling renderings.
- LEM should have no other properties than LEM properties: LEM materials should never have any other Podium Material property applied to them. For example, do not have reflections or bump properties on an LEM material. This can cause the rendering to crash or turn the LEM material into a black face. In fact, it's best to use plain colors like yellow, white for LEM materials.