Podium Preset Editor - UI and Features
Podium Preset Editor (PPE) allows all of the Podium render engine parameters to be configured. This means that you can easily make adjustments to render settings for individual scenes and create your own customized preset. You can modify existing presets, or create new presets.
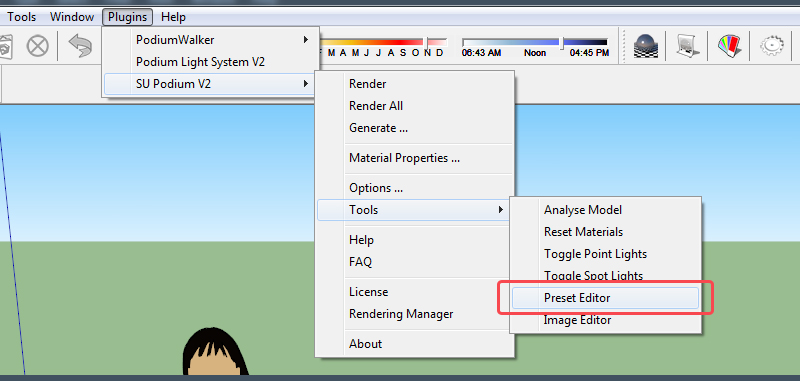
PIE can be accessed from the SU Podium V2.5 > Tools > Preset Editor drop-down menu (shown above) which will then open the Preset Editor dialog box.
The main window has 4 basic sections, the tool bar at the top, the principal option group, the detailed parameter window and description pane:
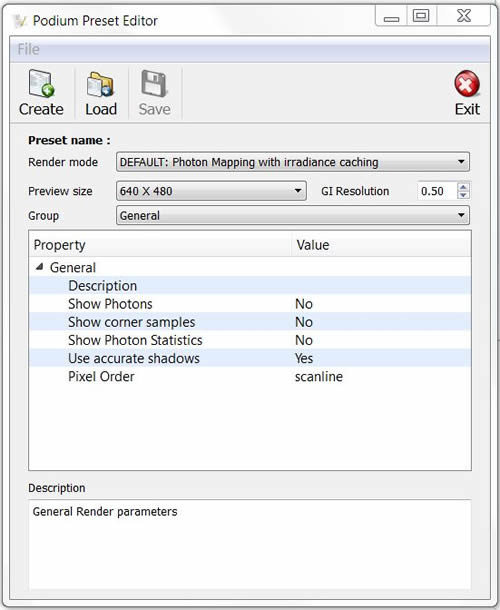
1. The Upper Toolbar:
The tool bar is self explanatory. However, a couple of things should be mentioned.
Naming your preset. You can Load an existing preset from the tool bar. These can be one of the 11 standard presets supplied with the installation of SU Podium V2.5 Plus. The presets reside in the C:\ProgramData\SketchUp\SketchUp 201x\SketchUp\Plugins\SU_Podium_V2.5\ presets folder on Windows and MacIntosh HD\Library\Application Support\SketchUp 201x\SketchUp\Plugins\SU_Podium_V2.5\presets\ on the Mac. However you can not save a customized preset with the same name as one of the standard SU Podium presets. You will receive a "read only" message if you try to save a customized preset with a standard preset name.
Create and Save are similar. When you have finished either creating a new preset from scratch or edited an existing preset to suit your needs, use the Save button to save the preset. By default, it will be saved to the \Preset\ folder so it will be available to you from the preset list from the Options dialog box. Make sure you give your customized preset a unique name. PPE will automatically assign a .pps file extension to your preset.
2. The principal options:
The Render mode selects the render algorithm used. Most of the time you will only need to use the last 3. Path tracing is an unbiased render algorithm that samples every point in an image rather than the biased selective sampling and interpolation used by the others. The default method is Photon Mapping with Irradiance caching. When configured correctly, you should not need any other render mode to produce great results quickly.
Preview Size is the size of the dynamic preview window used by OOPR or Podium Render Manager.
GI resolution is effectively a multiplier which affects the basic sampling distance. For interiors, 0.5m is a good balance between speed and accuracy. Smaller distances produce more samples and accuracy, but increase render time. Larger distances are faster, but lose details like contact shadows.
3. The 'Group' selector:
The Group selector allows different groups of render parameters to be configured.
Most of the render parameters do not need to be modified, and do not offer significant benefits by changing the values.
The notes in the Description panel will help you to configure the render parameters.
Before you start to configure your render parameters, it is worth explaining a little about how the render process works.
Podium uses the Kray render engine which is a physically accurate render engine which can used biased or unbiased algorithms, but is principally based on very fast biased techniques. Unlike unbiased algorithms, Biased algorithms do not sample every pixel in an image. They fire a number of photons into a scene at key points, group these samples into cells of similar levels of irradiance, and blur each cell together, interpolating the irradiance between cells.
This is generally a lot faster than sampling every pixel in a scene, but as one might expect, it is usually less accurate. The engine has a number of sophisticated techniques to overcome inaccuracy, and produce good render speed.
Photon mapping with irradiance caching involves a number of distinct stages in the render. First of all, photons are fired into the scene. In the pre render phase, an 'irradiance map' is calculated. This ignores textures, but takes into account material properties like reflectivity. The path of photons through the scene is calculated, taking into account light bounces from the various surfaces. The default way of calculating the light path, is from the scene back to the source. The advantage of doing this is that if you fire a million photons, they will all be visible in the scene. You will not 'lose' any outside the scene, for example behind objects or outside windows, and you don't need to change the number of photons fired for every scene.
When photons are fired, illuminance values are calculated at sample points. Each sample point with a similar illuminance value to the adjacent area becomes part of a 'cell'. The irradiance is then smoothed between the cells. The fewer photons (and cells) the faster, but more inaccurate the render. However, even firing more photons won't necessarily fix the issue, because if enough cells aren't smoothed together, you get blotches.
The final gathering stage then takes samples from the scene, taking more samples where there are greater areas of contrast. To increase quality, more than one pass can be configured, with successive passes refining the previous one. Although this increases render time, it produces a smoother higher quality render, which makes the anti-aliasing pass faster.
The objective with biased render engines is to use as few samples as possible to produce the best result in the shortest time.
The Description pane
The description pane provides a short description on each parameter and its effect on the overall render.
Each group of parameters is described in a little more detail below.
Group - This section contains no settings to determine quality. The Accurate shadows parameter provides a shortcut for scenes that do not have fine or complex curves, to reduce render time slightly.
Photon - This section configures the basic settings related to photons. Pre-cache blur provides an alternative way of blurring the irradiance map. It can produce smoother renders, but at the expense of loss of detail for things like contact shadows.
Final Gathering - Final Gathering is the last stage of the render calculation. It refines the initial pre render information on biased render modes to create the render
More descriptions coming. The description panel has quite a bit of information for each group and it's parameters but we will be adding more descriptions to this web page to help in the creation of customized presets.
In the meantime, you can always consult the complete preset documentation PDF file, which explains every Kray parameter and variable used in Podium presets.