10 Tips for Better Exterior Rendering
INTRODUCTION:
Long-time Podium user, Nat Ellis gave a talk at the SketchUp 3D basecamp earlier this year explaining how he uses SU Podium in his work at JB Architecture. The talk was very well recieved, and we posted a transcribed version of his presentation here.
On this page, we've condensed some of his talking points into a list of tips for improving your exterior renders. Whether you're new to Podium and exterior rendering, or simply would like to improve your images, this can be thought of as a simple checklist to consider every time you render. A reminder of the kinds of things you should think about while you work—"Is my background image good enough? Are all my textures up to a high standard? And so on.
1. Sun and Shadow Position

When doing an external render, getting the sun position correct is worth spending time on. Too much sunlight and the scene will look too washed out, too little and it will be underexposed. Likewise, shadows add realism to your render, so take great care when setting your sun position. Always try compose your shadows in a way that shows off your building in an attractive way. This can be a case of trial and error and doing test renders to see how your model looks at different times of the day and year.
- Pro tip: The solar north plugin lets you set your shadow direction with a great deal of precision, and is useful in positioning the sun and shadows so that they support your composition.
- Cast shadows from unseen objects can add life to your scene; adding trees trees that cast a shadow onto your building or ground from behind the camera can look very nice!
2. Sky

Be careful if you plan to add your sky in Post Processing, as it can be very hard to make it match the render and look realistic. Unless you are a skilled Photoshop user, it is often best to keep the sky that the scene renders with. Done well, a post-processed sky can make the scene more realistic, but done badly it will detract from the realism of an otherwise good render.
- Cloud domes - Podium Browser cloud domes work well with the Podium Physical sky options, and Again adding clouds its normally best to add this in Sketchup from the Podium Browser, but they can be added in PP, done well it will make the scene more realistic, done badly it will detract from the realism of the render. Learn more about cloud domes here.
- Image planes - Even if you don't use a full cloud dome, using a curved image plane with a sky/cloud image applied to it can be a great solution, and prevents the tonemapping issues that come with adding a sky in post-processing.
3. Good Textures and Materials
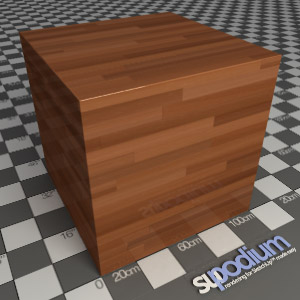
One bad texture can make the whole render look bad. Spend time selecting textures and configuring your materials. This is one spot where the Podium Browser material library can speed up your process tremendously as all the textures are high-res, seamless, and pre-configured with Podium material properties.
- If you are going to make your own textures, make sure you do it from high resolution photographs; likewise if you are importing textures from third party sites.
- If you aren't using Podium Browser, Textures.com (Formerly CGTextures) is one of the best sources around.
4. Background Image
All the advice from the "sky" section also applies here. Adding your background image in SketchUp is typically better than adding one in post-processing, as lighting and tonemapping will match and it will blend into the scene more effectively. Adding a background in PP can be done but needs skill to make it look right.
- Podium Browser backgrounds - The Podium Browser environment tab contains a growing selection of panoramic background images and tree-lines which make it easy to add a background to your scene before you render.
- PIE Background library - If you intend to add a background in post-processing, don't forget that Podium Image Editor has an integrated background library.
5. Reflections
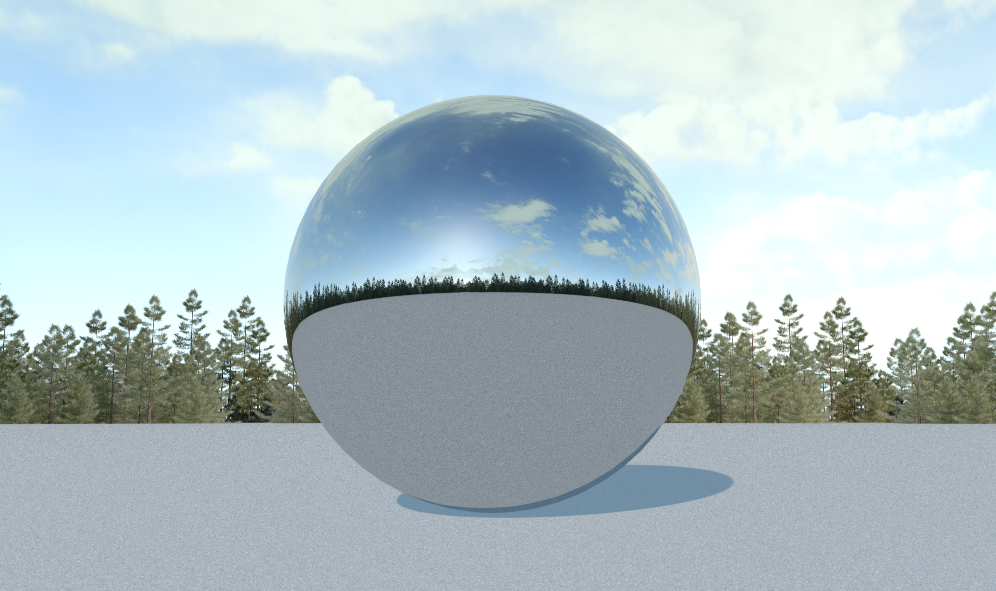
Refections are what will make your render realistic, so getting the correct refections is key. If you have windows make sure the glass texture is from the Podium Browser, if your glass does not look right or there are no refections in the glass you will need to add a background behind the camera so the glass has something to reflect, sometimes you will need to add several backgrounds before you get the right amount of reflection in your glass.
- Podium Browser contains several free water and glass materials, so even if you don't have a paid content license you can use PB as a starting point for these reflective surfaces.
- Cloud domes and panoramic backgrounds: - As mentioned earlier, the assets available in the Podium Browser environment tab are great for adding realistic reflections to your scene. Don't hesitate to place as many off-camera components as necessary to get the reflections you need.
6. Plants and Trees
Using 3D vegetation will generally look more realistic than 2D .png cutouts. As 3D trees use more memory and take significantly longer to render, it is often a good idea to use 3D vegetation in the foreground, and 2D trees and plants in the distance.
- Avoid repetition: Make sure your planting is not too repetitive. Always vary your plants and trees so that they do not look identical, use the scale and rotate tool to make each one look slightly different.
- Optimization tip: If your viewport is becoming sluggish when using 3D plants and trees, place your vegetation on a new layer and turn it off until you're ready to render.
7. Cars/People
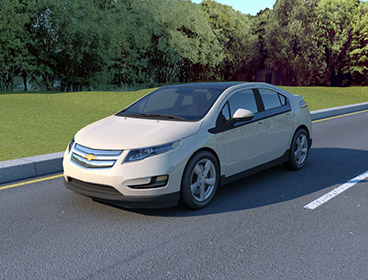
Cars - Adding cars to urban and residential scenes is recommended as it provides context and scale, and makes the setting feel lived in. Adding a license plate to your cars will add the extra realism to your scene—small details like this go a long way.
People - When adding people you need to be very selective. It can be hard to make 2D png cutout people look like they belong in the scene. A good rule of thumb is to not add people unless you're sure it adds something to your scene and doesn't detract from the quality of the render.
- Tip: Adding people to the inside of a building that can be seen throug the windows can be a great touch!
8. Grass
Getting your grass to look realistic can be a challenge. Using the right grass texture is very important, so play around with different textures, making sure the scale is correct and does not create a repetitive pattern. Changing the colour can also help; you will need to do some test renders to see what looks best.
- Ground variation: If you have a large area of grass using the sandbox tools to add subtle variation to the ground will make it look more real.
- Podium Browser 2.5D grass: If you have a paid content license, Podium Browser's 2.5D grass components can yield very convincing results, but requires some additional work. Read the Podium Browser 2.5D grass tutorial here.
- Sometimes adding grass in PP might be the best option if you want realism that a 2D texture won't give you.
9. Correct Camera Height
When setting up your camera view, make use to set it an normal eye hight. Think of yourself as a photographer, and compose your image accordingly. If you set your camera too high, it will look odd and detract from the realism of the scene.
- Rule of thirds: Although this is not a hard-and-fast rule by any means, it has always been a useful guideline. Think about focal points, and where you want the viewer to look. And if your are unfamiliar with the rule of thirds, read here!
- Field of view: Setting the field of view is equally important. Think about how FOV can be used to highlight and emphasize your model to make your image appealing. Making the field of view it too large can diminish the impact of the structure you are trying to showcase; setting it too narrow can remove context and make the image feel claustrophobic.
10. Details, details, details
Adding as much detail as you can to an external render will always make your render more realistic. We are used to seeing so much detail in the outdoor eviroment that if you miss the small things your audience will notice. For example, a house with out rainwater downpipes will look less realistic than one with them. The best approach is to look at real life and copy this into your sketchup model to the best of your ability.
Some of the things that people commonly miss:
- Curbs on roads.
- Subtle height variation on the ground plane.
- Downpipes and drainage.
- Adequate detail on roof construction, window reveals, and similar.
- Unconvincing or overly repetitive asphault, concrete, and stone textures.
- Leaving empty spots along the horizon causing the default SketchUp background and ground plane to be visible in the render.
The list of details to consider is truly endless; you obviously can't cover every single thing, but always ask yourself have I done enough for this to be convincing? Use that question to identify where you need to devote more attention, even if it's just another 10-20 minutes.
To conclude: If you've made it this far, you should be well on you way to creating stunning exterior renders in SU Podium.
There are very few hard rules in rendering, and the process inherently involves some amount of trial and error; but as long as you know what to think about while you're rendering, and how to apply those concepts to your images, the process will eventually become second nature.