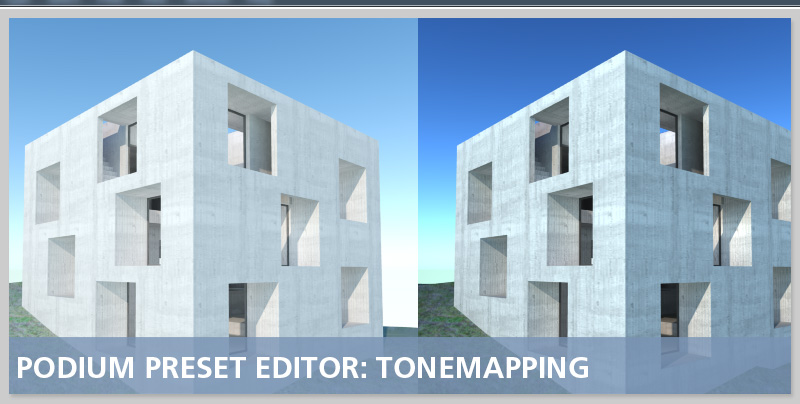
Podium's power and intuitiveness is based on having all the various render engine parameters pre-configured in presets. This makes it really easy to get great images with minimal effort.
However, sometimes you may find that the settings in the preset aren't suited to all scenes. You don't have to simply stick with the standard settings however, editing presets is easy, but there is a learning curve. We have tried to make everything as easy as possible in the Preset Editor, but the range of options and parameters can be daunting.
The parameters for configuration are neatly grouped, to make editing much easier. Some sets of parameters are fairly self-contained and can be edited independently of the rest. This first tutorial deals with Tonemapping.
Tonemapping is a term which at its most general level refers to the overall appearance of an image including brightness, contrast and saturation. Wikipedia has a detailed explanantion here, but for current purposes it is better to consider it as the tonal balance (or overall appearance) of your images.
Before we start, there is a little explanation required. Tonemapping is actually rather more complex than you might think. First of all we have to look at how monitors actually display graphical information. Fundamentally, for reasons that are more complex than we can cover here, monitors and computers cannot display colour information accurately.
This requires a little explanation. Because computer monitors can't display the full tonal range in an image (which is why we use HDR images and photography), images need to have a gamma modification applied automatically to make them look more natural. You don't do anything, this is a 'monitor gamma' component applied to displays, which is dealt with at device driver, or OS level. A detailed explanation is beyond the scope of this article, but there is a lot of information on the web (look up 'Linear Workflow') which explains it in more detail.
The Input Image Exposure parameters set the input gamma to match the way the gamma is modified at OS level. In simplistic terms, images displayed by monitors (including the textures used in your models) are artificially brightened. When you set the brightness in your render engine, it's better to correct this first, otherwise you can make an artificially brightened image even brighter, and will lose saturation and detail. Gamma correction effectively brightens midtones in an image and reduces contrast. In the presets, these parameters in effect tell the render engine what the monitor gamma setting has been applied to your colours and textures, allowing for it to be accounted for when configuring the output image tonemapping. Normally you shouldn't modify these.
Podium tonemapping allows you to configure two types of tonemapping, gamma and exponential. Gamma is similar to gamma correction in an image editor. It will brighten the midtones of an image, but reduce the contrast and saturation. Exponential does almost the reverse, and allows the contrast and saturation to be enhanced, but with a slight darkening effect. You can also blend the two modes to balance brightness, contrast and saturation.
Let's start by opening the Podium Preset Editor, referred to as PPE from now on. Let's load a preset to edit. We'll start with an external preset based on exterior default 1.0.5, click on the 'Load' button, navigate to your presets folder and load your template. You can download the test preset from here. The Tonemapping group displays only the tonemapping parameters. Save this as a new preset and restart SketchUp. Because Podium loads the list of presets when SketchUp starts, each time you create a new preset, you need to restart the application.
Now, reopen SketchUp, switch to the new unmodified preset and start by making a control render for reference.
This is how the render looks:
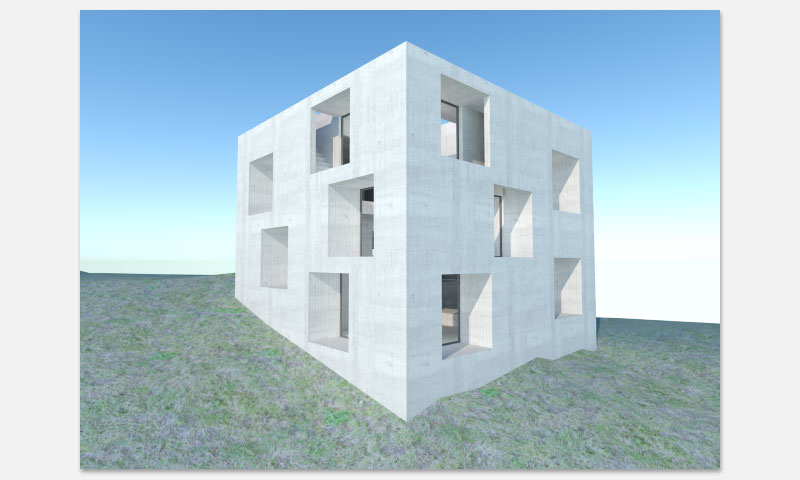
Figure 1. Control render with unmodified preset
Now let's try to adjust the tonemapping.
To show how this works, in the Tonemapping group, set the blend value to 1 as indicated below. This sets tonemapping to 100% exponential, removing any gamma component.
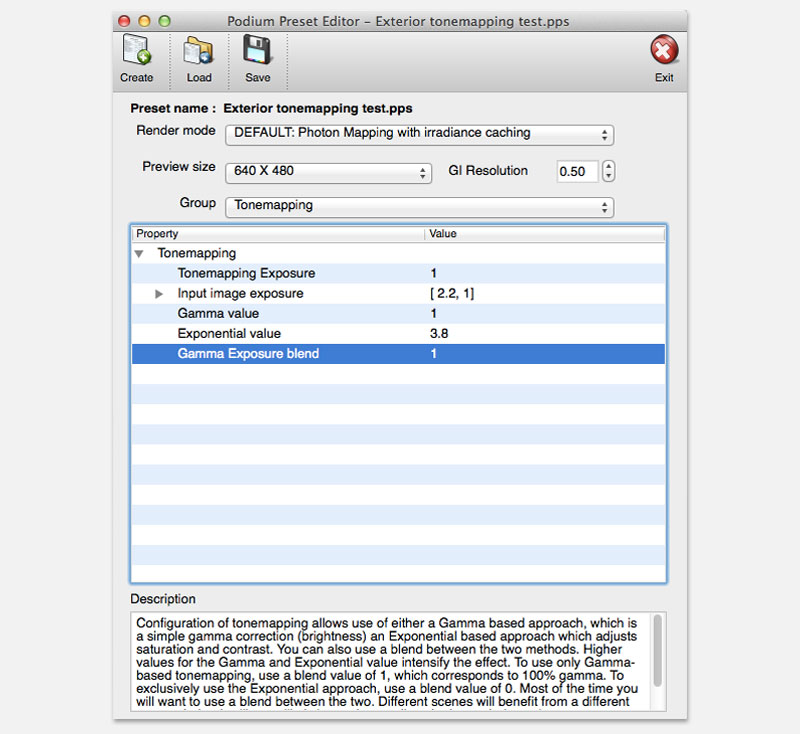
Figure 2. Configure 100% exponential component
Let's render with this preset and see how it looks.
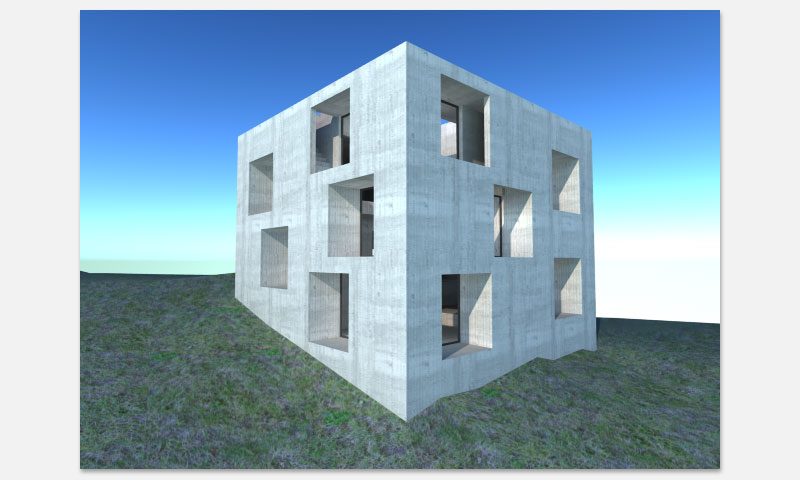
Figure 3. Render with 100% exponential component
Right away you can see that there is more saturation and contrast over the entire image, including the background sky. Note also the banding effect in the sky. The effect is like tweaking the saturation and contrast in an image editor.
Change the name of this image so you can remember what you did to get the results. When configuring presets, there are so many values to configure, that unless you approach the tweaks systematically, you will end up with a whole folder full of images with no idea what you did to the presets to create them!
Let's try to disable the exponential component and use just the gamma component, by setting the gamma exposure blend to 0. When we save the preset and render, this is what we get:
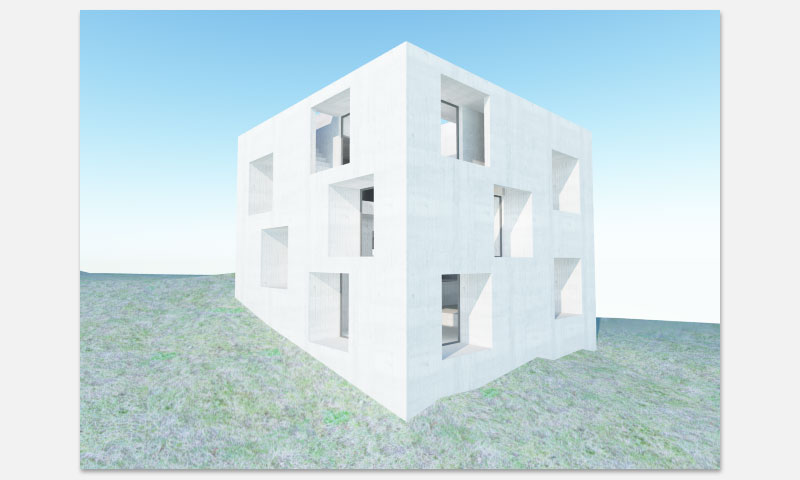
Figure 4. Render with 100% gamma component
You can see that the whole render is brighter and flatter with less colour saturation - it looks a little 'washed out'. As before, make sure you rename the rendered image to remind yourself what you did to get the image result.
Setting the Gamma Exposure Blend variable will blend between the two effects. The exterior default 1.0.5 is configured with a value of 0.4, which corresponds to 40% exponential, and 60% gamma. By changing this value, you can shift the bias to get a brighter, less contrasty image with less saturation, or a darker image with richer colours and more contrast.
Let's go back to the gamma component in more detail. The first variable in the dialog is Tonemapping exposure. This is the overall baseline value based on physically accurate values. Generally we shouldn't need to adjust it, but we'll modify it to see what effect it has. Let's stick with using 100% gamma (no exponential component) and reduce the Tonemapping exposure value to 0.8, which equates to 80%.
The image below shows how this renders.
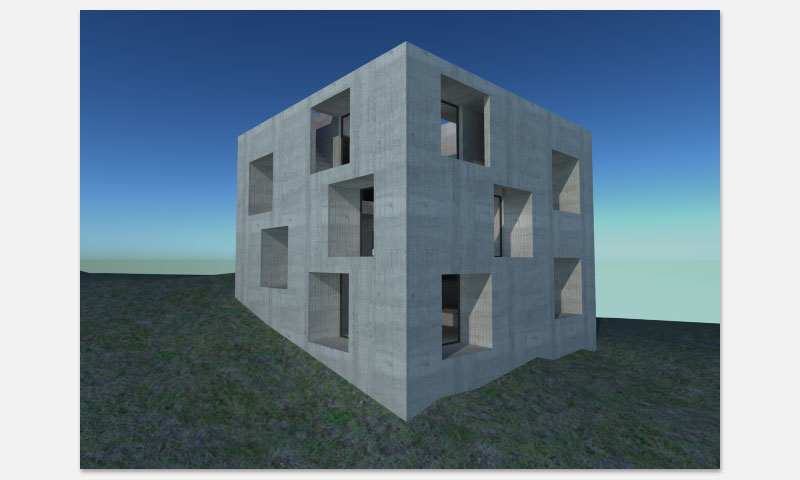
Figure 5. Render with 100% gamma component and Tonemapping exposure value of 0.8
You can see that the overall image is much darker. You can guess that if you increase this value, the resulting render will be much brighter than Figure 4. Now that we know what effect that parameter has on the overall image, let's reset it back to 1, and look at the Gamma value. That is currently set to 1, which equates to 100%. Let's set that to 1.2 (120%) and see what that does.
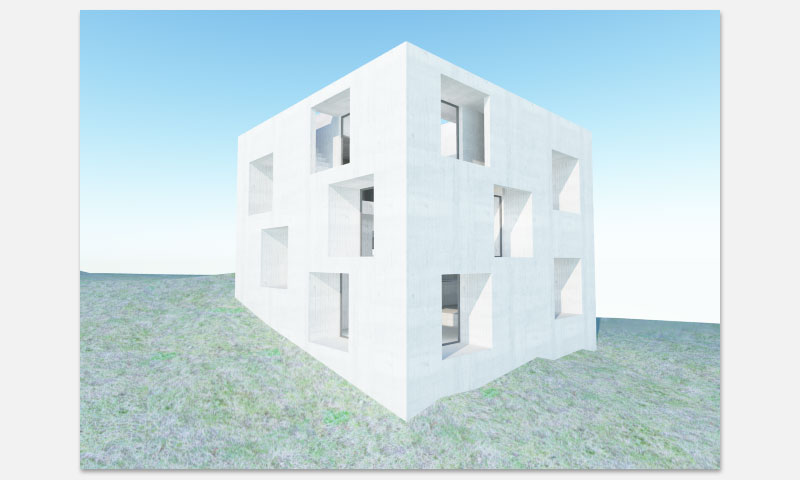
Figure 6. Render with 100% gamma component, Tonemapping exposure value of 1 and gamma value of 1.2
Next, we'll set the gamma value to 0.8 and see what that looks like.
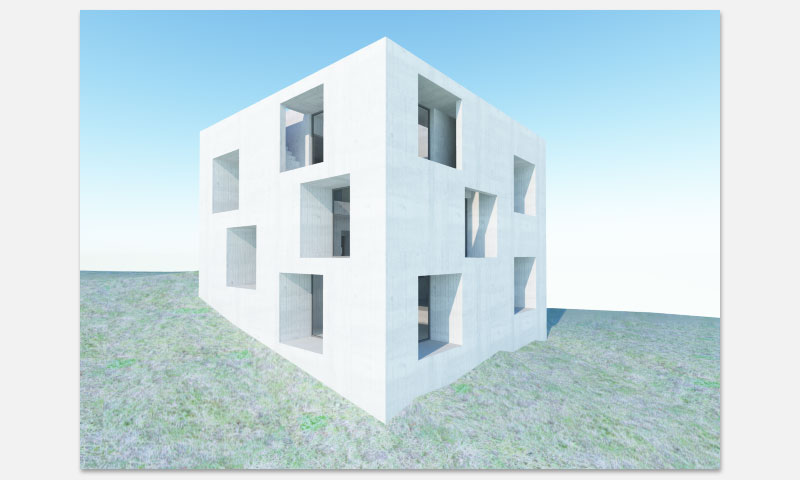
Figure 7. Render with 100% gamma component, Tonemapping exposure value of 1 and gamma value of 0.8
This has only a minor effect on the overall appearance. You can see that the shadowed areas are slightly darker, but otherwise there's not that much difference.
Now that we know what the gamma values do, let's turn to exponential component. Figure 3 showed the effect of using just exponential tonemapping. Let's see what difference modifying those values makes. First of all we'll start by increasing the Tonemapping Exposure value to 1.4.
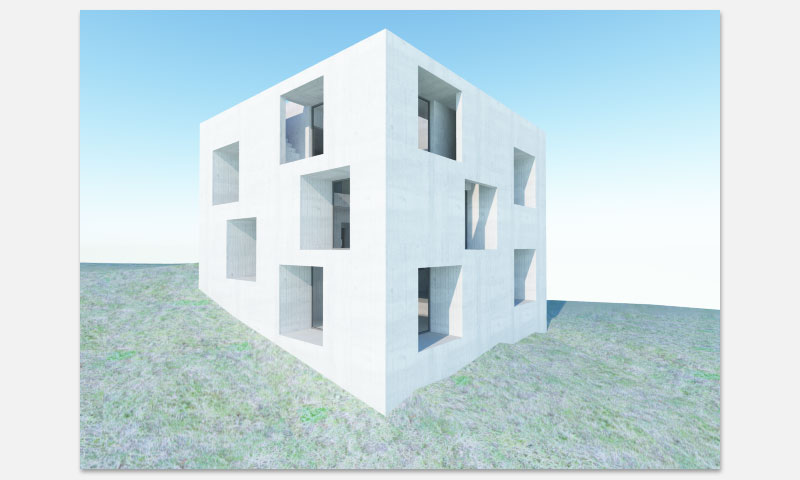
Figure 8. Render 100% exponential component, Tonemapping exposure of 1.4 and gamma value of 1
You can see that the image is much brighter, the walls are over-exposed and contrast is increased. The tonemapping exposure in some respects overrides the effect of the exponential tonemapping because the overexposure washes out the textures.
Let's reduce the Tonemapping exposure value to 1.0 as in Figure 3 and see what happens when we reduce the Exponential value from the standard 3.8 ( as used in the exterior default presets) to 3.0.

Figure 9. Render 100% exponential component, Tonemapping exposure of 1.0 and exponential value 3.0
You can see that changing the Exponential value parameter makes almost no difference.
Let's try and increase this value to 5.0 and see what difference this makes. Figure 8 below shows how this renders.
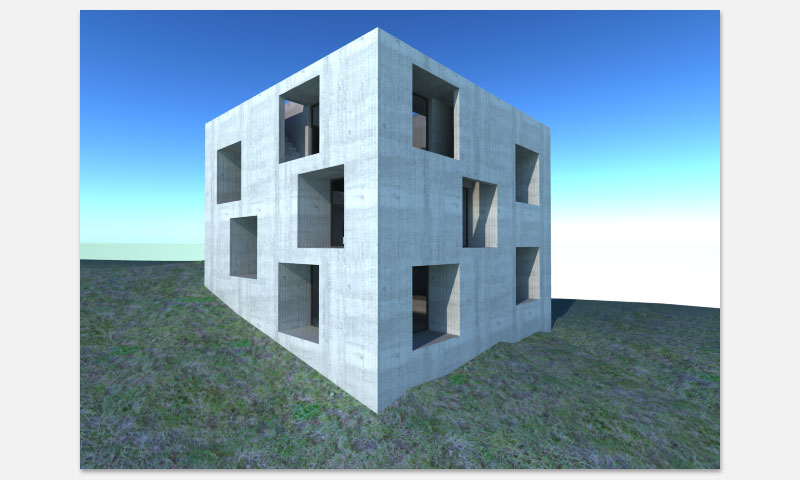
This has only a very minor effect on the overall appearance.
In summary, you can see that the parameters which have the largest effect, are Tonemapping exposure, and Gamma Exposure blend, and Tonemapping Exposure. Although in the latest presets, these are configured to give a balanced output, they can be adjusted for personal preferences.
Feel free to experiment and post your questions and share your experiences on the forum. Happy rendering!
