Prerequesites: Access to Photoshop, or any image editor/compositing software that can apply a lens blur based on a z-depth map.
Using Photoshop's lens blur filter and a z-depth pass from Podium, we are able to add believable depth of field to a Podium rener.
While SU Podium cannot create depth of field automatically at render time, Podium does have the ability to output several additional "render channels" along with the final image you're accustomed to seeing.
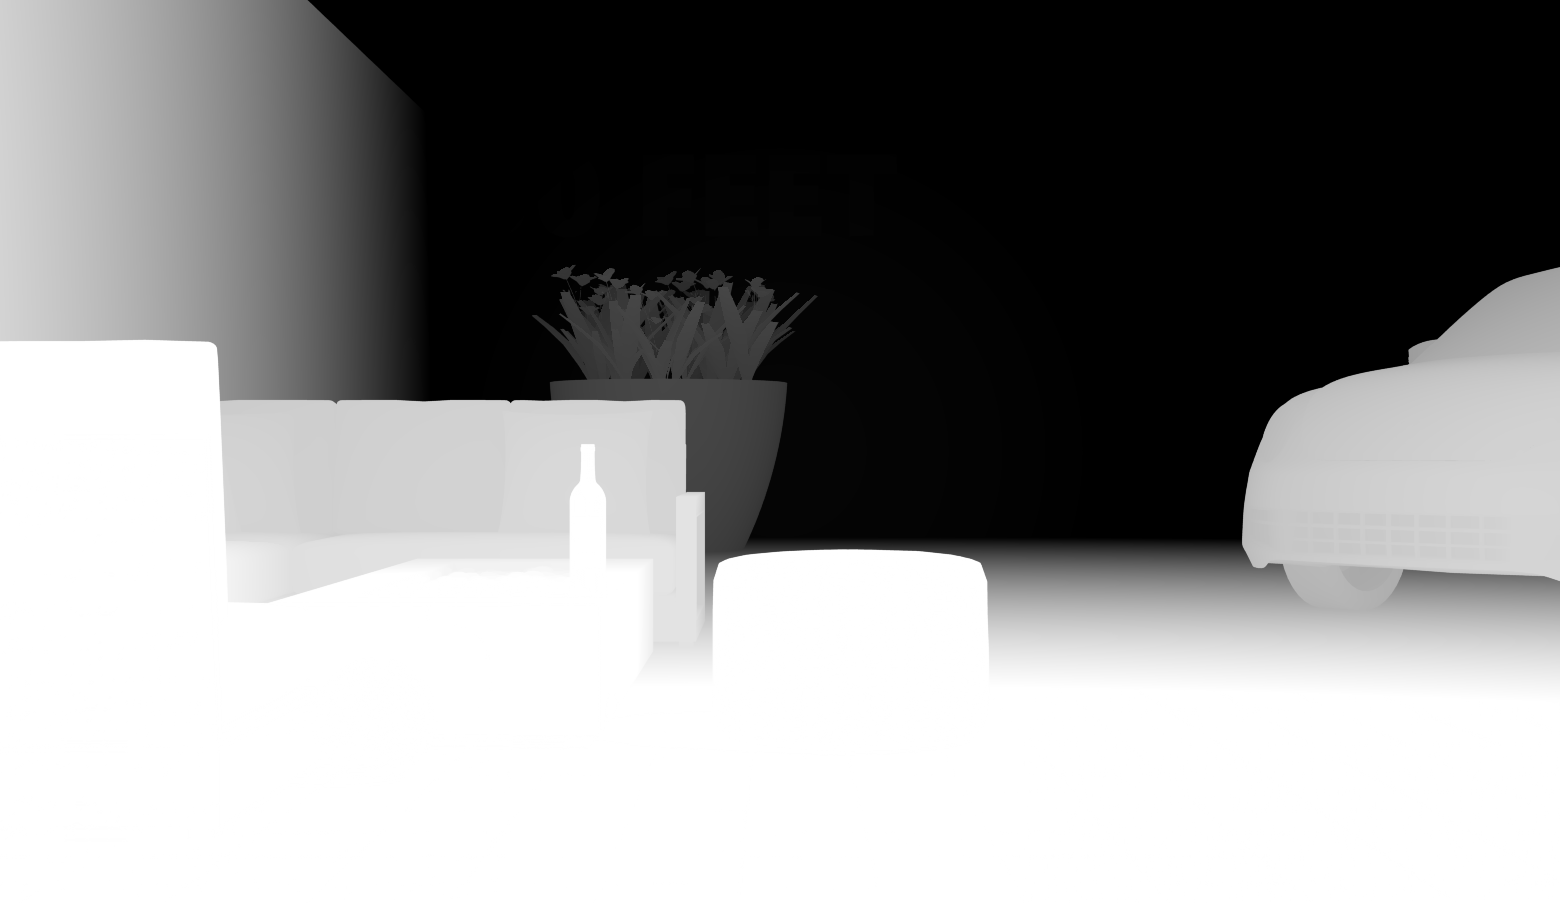
One of these output options is known as a z-depth pass — a depth map which renders distance from the camera as a grayscale gradient from white to black.
A z-depth image created with SU Podium. We will use this image to add depth of field to our raw Podium render.
This depth pass can be used in post-processing to create a lens blur that very closely approximates the photographic depth of field that one might produce when using a lens with a wide aperture, long focal length, or very near subject.
This guide is broken into two sections:
Part one - Explains how to modify a Podium preset so that Podium saves a z-depth pass in addition to your render.
Part two - Demonstrates how to use Photoshop to produce an accurate lens blur.
Project files
We have uploaded the SketchUp scene, rendered images, and presets used if you would like to follow along using the same assets shown in the videos.
1. Modifying a Podium preset to save a z-depth pass
The first video explains how to modify a Podium preset so that Podium saves a depth map along with the finished render, and then demonstrates how to tonemap the z-depth pass for best results. The following notes review the important information points from part one.
The needbuffers line tells the render engine which render passes to save. Each of the numbers is a code that adds a specific render pass to the output.
So by adding the line needbuffers 0+0x1+0x2+0x8, we tell Podium to save the following images:
0x1 (final render)
0x2 (alpha channel)
0x8 (z-depth pass)
The depth pass (0x8) is what we are interested in for this tutorial, but in order to get a usable depth map we need to make sure the image is properly tonemapped.
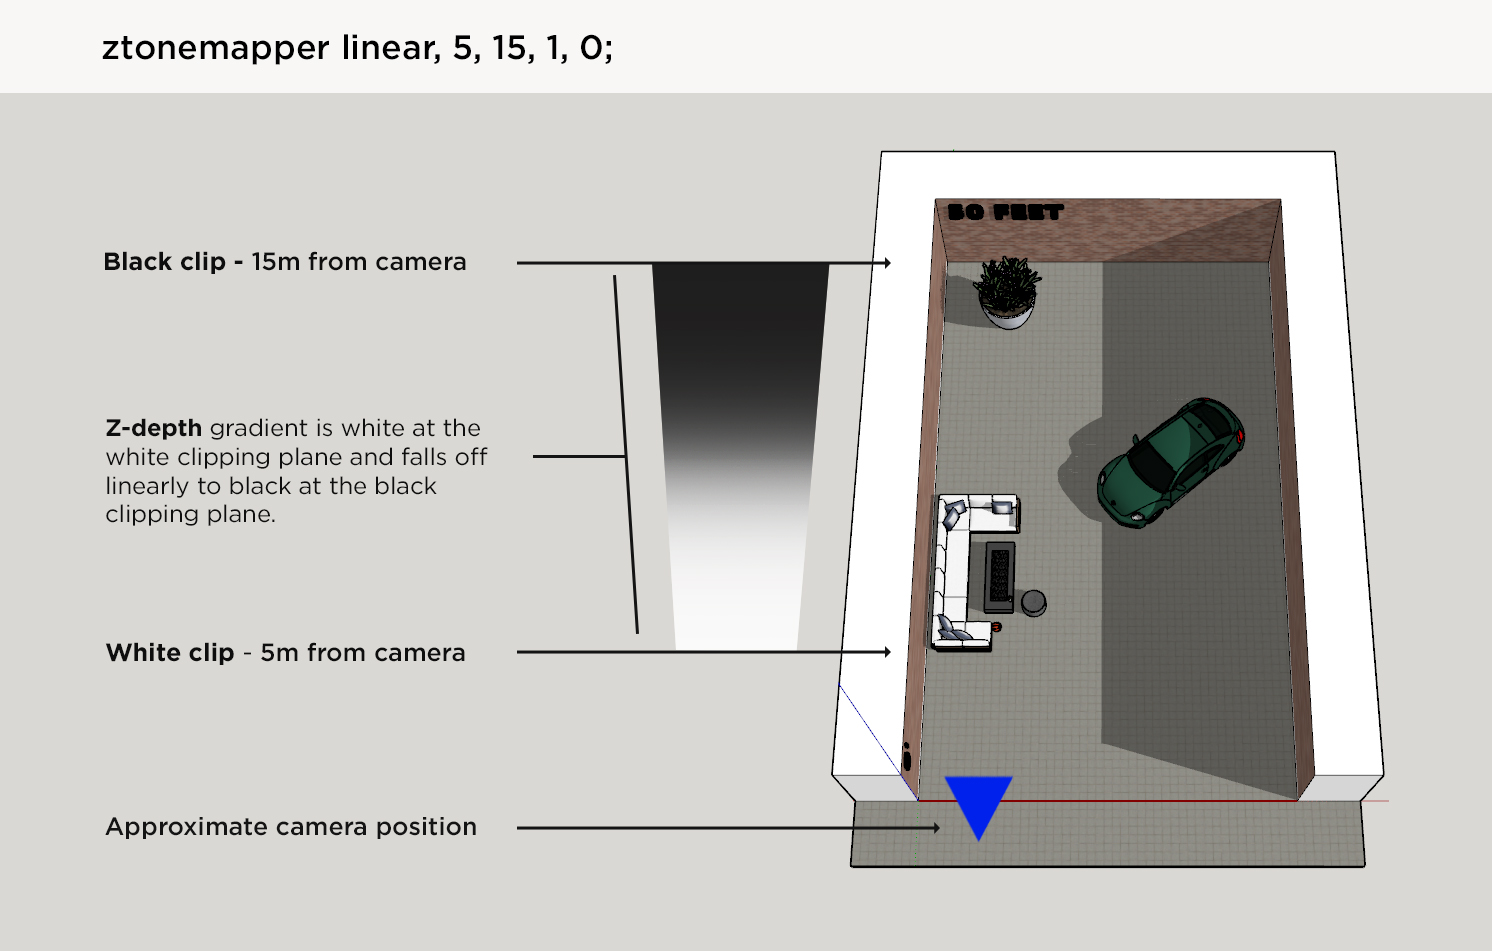
This is the purpose of the second line, ztonemapper linear,5,15,1,0, which is explained in the video and below.
3. Ztonemapper - Explanation and best practices
The ztonemapper line contains four numeric variables which determine the way the z-depth image is tonemapped:
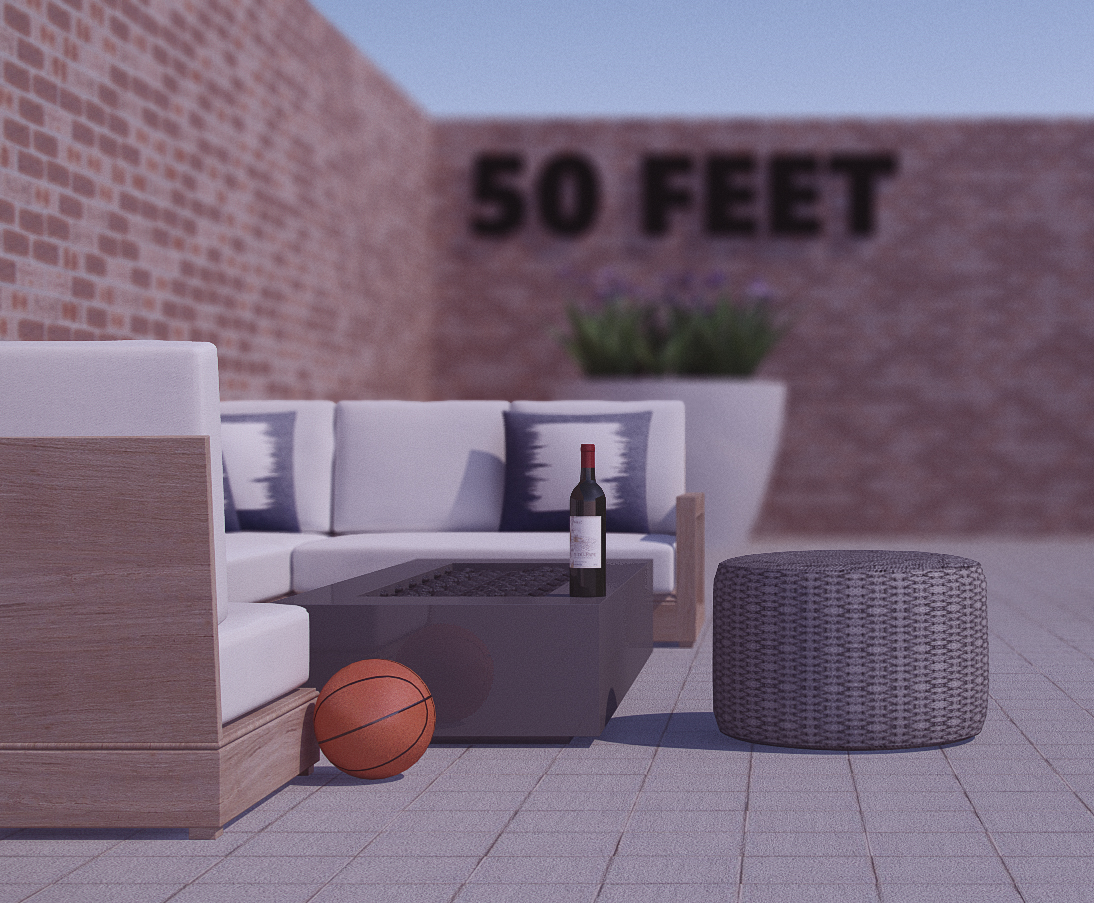
White clip - Distance in meters to the white clipping plane. Meaning: At this distance in front of the camera, the z-depth image will be white. The final depth pass should be a smooth gradient from white (near the camera) to black (near the back of the scene). Position the white clipping plane as close as possible to the object you want in sharpest focus. In the video example, we focused on the wine bottle, which was five meters in front of the camera.
Black clip - Distance to rear (black) clipping plane. This is the distance from the camera at which the image should be black. The darkest portions of the z-depth pass will be the blurriest when we apply the lens blur.
White value - The default value (1) implies pure white. If for some reason you didn’t want the full value range in your z-depth pass you could reduce this value, however our recommendation is to leave this value at 1 so that the focal point of your final image remains sharp when the lens blur is applied.
Black value - The default value (0) implies pure black.
Note – The ztonemapper does not recognize SketchUp units and must be specified in meters. In the test scene, for example SketchUp was using feet and inches, however the white and black clip are set in meters - 5m for the white clip, and 15m for black. Had the clips been specified in feet, the depth gradient would not have rendered correctly.
2. Adding depth of field based on z-depth
If you already know how to use a z-depth pass to control lens blur in Photoshop, you may not need to watch the second video. If this concept is new to you, please see below:
That's it!
If you have any questions, the best place to ask would be the SU Podium forums. And as always, we would love to see what you create!