Finalizing a Render With Post Processing
If you did not already know, the acronym “PP” which is vastly used in the rendering world refers to Post Processing. It is a “second touch” to your images produced by the renderer. Many programs will help you do this. The most popular, Photoshop, will be used in this article, but many other lower cost or free image editor exist. Some examples would be Paint Shop Pro, Fireworks, Gimp and even Adobe Elements.
In SU Podium V2 Plus, there's an easier to access image editor called Podium Image Editor that can be launched with your rendered image, instantly from within the Podium Render Manager (OOPR). Read about Podium Image Editor here.
The goal of PP, is to fine tune your images; tweaking it to your liking, with speed and a lot of control. Using PP is a lot faster then re-rendering in Podium each time you need a tweak and therefore is very productive. Many PP features are not offered in Podium simply because they are readily available in PP programs. Post processing programs are especially good at tweaking colors, brightness, contrast, etc. so lets leave these features to them. Podium Image Editor has all these basic features. In addition, all photography and rendering professionals uses PP. Post processing is often a necessary part of your work flow as you can not expect even the most advanced photo-realistic rendering program to output perfect images every-time.
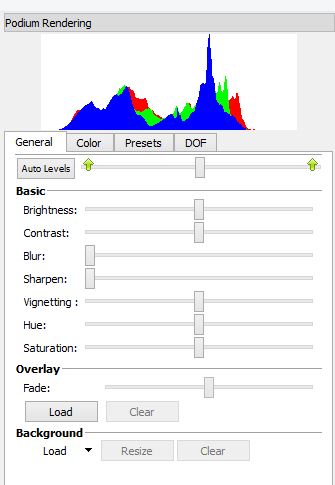
Podium Image Editor
Good lightning is crucial for a high quality image and can be tricky to achieve directly in Podium. That’s where PP comes to help. There's no need to fine tune your lightning in Podium/ SketchUp. One achievable goal is to get all the correct light sources to provide an acceptable level of brightness in Podium. Then, adjust the lighting to your taste in PP. For example, a dark rendering is easy to brighten-up whereas an image that is too bright will often be beyond repair. So it is better to aim for less brightness in Podium to be tweaked in PP, where you have instant response and lots of control.
In Post Processing programs, the brightness feature generally will not give you good results as it will whiten or darken the entire image. What we want to do instead is to brighten the white areas, almost as if the Podium lightning was stronger. That’s where the “Levels” tool in Podium Image Editor or Photoshop is very helpful. Move the right slider to the left to brighten your image, but do not overdo it, so as not to lose information. Moving the left slider a bit to the right will also add some depth.
When the graphic shows low values on the sides, the sliders can generally be moved towards the middle without losing too much information. This is often when they need to be moved.

Photoshop
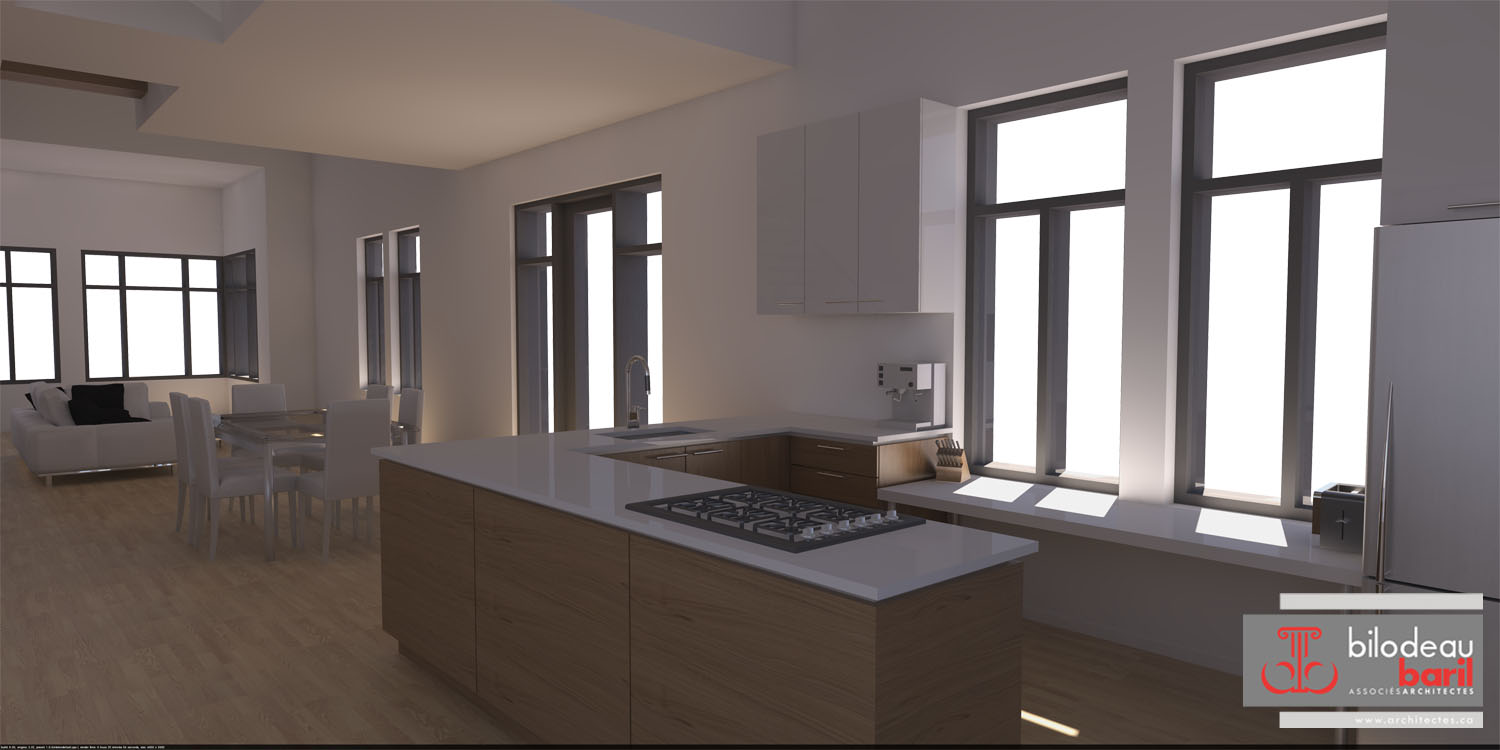
Below - Before: Raw Podium render - almost too dark to be usable.
Below - After Post-Processing: Levels adjusted to brighten up. Color balance to match the out-door photo and photo integration.

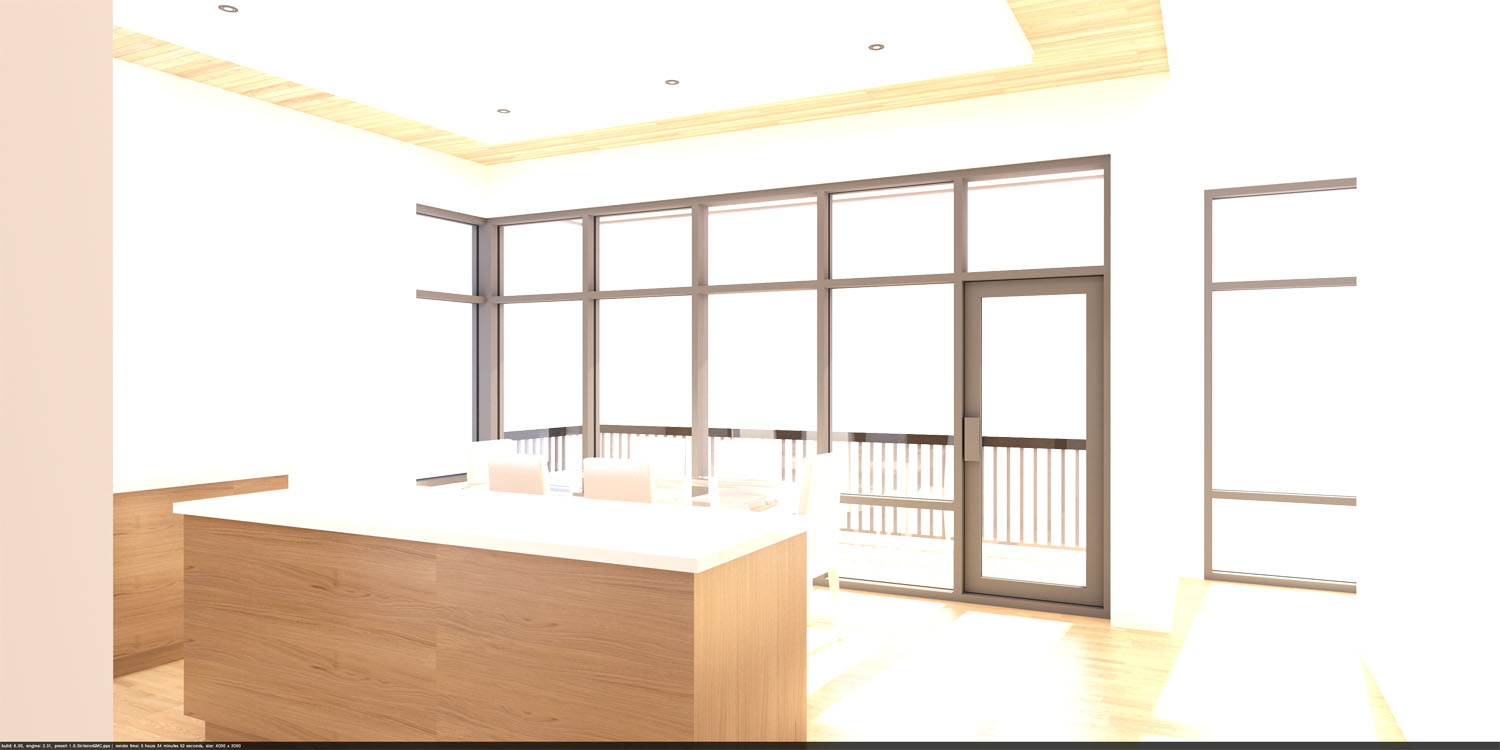
Below - Example of an over-lit rendering that cannot be saved
Many other modifications can be made, to make your renderings look better, such as; color balance (reducing the blue tint) saturation, depth of field, god rays etc. All of these, and many more have extensive tutorials on the Internet.
You many wonder why Podium Walker, includes a brightness slider and Podium does not. The reason, beside all the others mentioned above, is pretty simple. Walker is a real-time application used for video animations. When you change the value, you see the result immediately. That would not be the case for Podium. It would cost a lot of develop time to have PP features in Podium that are readily available in lots of image editing software.
PP techniques will save you a lot of time and help make your renderings look great with some practice. Head over to the Podium forum to get insight from us and other members on how to make your rendered images look better or show the rest of us your skills and techniques.
Happy rendering!