- SUPlugins Home Page
- Help Video Tutorial
- Forums
- FAQ and trouble shooting
- Operating SU Podium
- 1. Intro and Download
- 2. Install, Troubleshoot, Uninstall
- 3. Activate License
- 4. Render process and getting started
- 5. Download and samples to test
- 6. Where to get Support
- 7. What version do I have?
- 8. Check List to help Support.
- Options Menu
- Apply Material Properties
- Lights
- Render, OOPR, Preview
- Other items in the pull down menu
- Other Features and plugins
- 1. Podium Browser
- 2. Preset Editor
- 3. Omni Grid V2
- 4. Podium::Render script
- 5. RenderAll scenes
- 6. Podium Styles
- 7. Section_Tool
- 8. EditInPlace
- 9. PanoramaVR
- A summary of Tutorials
- SU Podium Books
- Software End User License Agreement
Apply Material PropertiesClick here to watch the material properties video tutorial.
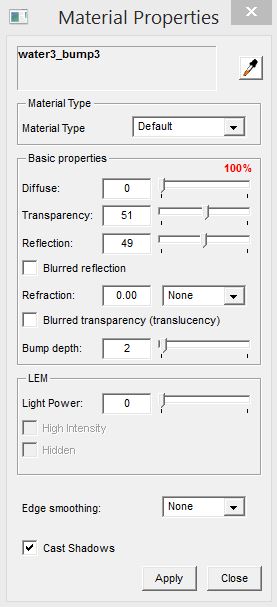
Reflections, refractions, bump maps, LEM lights and other properties are applied to a specific SketchUp material globally in the model. Select a SketchUp material you want to apply Podium properties to. You can select the material by selecting the face that the material is on or you can select the material directly from the SketchUp Material browser. When you make a material selection, its name will appear at the top of the Podium Material Property dialog box. The name must appear in the Podium V2 Material Property dialog box or no properties will be applied. Sometimes you need to select the SketchUp material more than once. 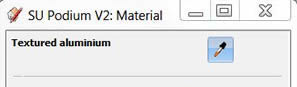 The SketchUp material name but be displayed in the SU Podium V2 Material dialog box. Please Note Curved Surfaces: SketchUp materials that are assigned to curved surfaces, should be selected from the SketchUp Material browser or with the Materials Property eye-dropper icon. These materials will not automatically appear in the Podium V2 material dialog box. Please see this known FAQ issues. Once a selection is made, apply the various Podium properties to the material by using the appropriate slider. This will turn the texture into a Podium material. Please Note: You must click on the Apply button for the properties to be applied to the material.
Advanced Metallic Materials Properties 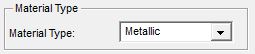 V2 Plus has an Advanced Material setting in the SU Podium V2 Materials UI. This will produce realistic metallic surface finishes. For non-metallic materials (default), the reflection color is the same color as the light it is reflecting. Metallic surfaces are different in that they should reflect light to be the same as the actual base material (or diffuse) color. For a real world example of this phenomena, you might consider the way a surface looks with bronze paint compared to the actual bronze metal. Click here to read more about advanced metallic properties. Additional Advanced Material settings will be added in the future. Note: When you switch from Default to Metallic or vice versa, you will lose all Diffuse/ Transparency/ Reflection properties on the material you are editing.
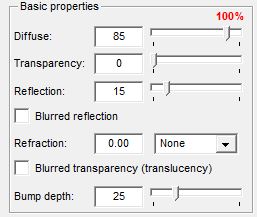
Diffuse, Transparency, Reflection sliders
Diffuse, Transparency and Reflections are connected to each other. The combined value of the three sliders should equal 100% when applied to a texture. In V2 Plus you will see a percent value as you move the sliders. For best results, make the percentage as close to 100% as you can. The default setting for non-transparent materials is 100% diffuse. However, if you want direct reflections on that material, move the Reflection slider to the right. The Diffuse slider will automatically move left. Diffuse is reflection that does not bounce directly back to the camera but reflects at an angle. An example of the difference between Diffuse and direct reflection might be the reflection of a paved road. When it is dry, it has more diffuse reflection. When it is wet, it has more direct reflections. You can not have 100% Reflection (direct) and 100% Diffuse. Otherwise the material will render strangely. Confused about Diffuse? Click Here Transparency is the SketchUp transparency/opacity property. Refraction is where light waves "bend" when passing through a material with a refractive index. A good example of this is a straw placed at an angle in a glass of water. The water has a refractive index of 1.33. The straw looks bent at the surface of the water. Although there is no such material as air in Podium, if there was it would have a refractive index of 1. Version 2 has a list of preset refractive indexes for certain materials. To use Refraction on a texture, select the texture and enter a refractive index. Check out a good explanation of refraction here - Wikipedia. Both Reflections and Refractions have a blur option. The render speed will slow down if you choose the blur option but the reflections will look very realistic. Bump Depth slider will allow you to apply bump maps to materials making the materials look rough and bumpy. Bump values also can produce an extremely subtle effect suitable for water.
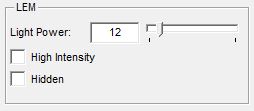
The Light slider in the material properties will apply an LEM (Light Emitting Material) to the material you have selected. LEM lights are one type of artificial light source in SU Podium V2 Plus and will create lights that emit light in one direction away from the face of the texture. LEM lights are easy to create and are quick to render. Light slider is the LEM light slider. Pick a material and apply the light slider. This will turn that material into an LEM Light. You can pick a value from 1 to 100. The values must be whole numbers. High Intensity check box is applied to the LEM Light. When High Intensity is on, single digit power values should be used. Otherwise the LEM light will be extremely bright. In most cases, you will not need the High Intensity option. Hidden LEM is a feature that will hide the material and SketchUp face that the material is on in the rendered image. The LEM light will be displayed but the SketchUp geometry and material will not be seen in the final image. Warning: Do not apply any other reflection, refraction, or bump Properties with LEM. Worst case, this combination will crash SU Podium and SketchUp during rendering. In the best case, the material will render black. See more about artificial and natural lights in the Lights section of the Help pages.
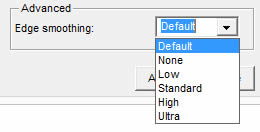
Anti-aliasing is an image process that is used in SU Podium to subtly smooth the jagged edges of objects in the image. In SU Podium, it is the last step in creating the photo-realistic image. It is a global setting that is equally applied through out the image. The SU Podium presets determine how much anti-aliasing will occur. For example the exterior_high and interior_high presets will apply a greater degree of anti-aliasing than other presets. However, there are times where you want some materials to have more or less anti-aliasing that what the preset has determined. For example, you may have a 3D tree model that has a leaf material applied to hundreds of leaves in the model. The anti-aliasing of the leaves could take minutes or longer. In that case, you may want to have no or low anti-aliasing applied to the leaf material. This will reduce the overall render time of the hundreds of leaves but still retain high anti-aliasing for the rest of the model.
Cast Shadows is an option to have a particular material not to cast a shadow in the rendered image. The default setting is checked to cast shadows when there is sun light or artificial light. This would be simulate the physical world. However, there may be times that you do not want a specific material to cast a shadow. One example shown below is Podium Browser's background clouds. At times the cloud background image needs to be scaled up to produce a realistic effect. But this will cause the cloud background image to cast a shadow over much of the scene. In this case, you may want to turn off the material property, cast shadows.
 The background cloud image is casting a shadow by default  The background cloud image has cast shadows turned off.
More about how to make great materials. Check out the collection of Render Ready Podium Materials tutorials page. Podium Browser Paid content materials. Check out the pre-made render ready Podium Materials in the Paid content of Podium Browser. |
© 2026 Cadalog, Inc. All Rights Reserved.
